It has been a while but finally I went on a short holiday again. I visited Iceland with my girlfriend Sonja and we had a great time. We were there for two weeks and took a lot of pictures and did some filming. The first week we visited the North part of the Island and now we understand why it is called ICE land :) It started snowing when we arrived and it was very cold because of the hard wind. Here is a short video from that first week with some fast impressions and some Synth.NL music from my AtmoSphere album. The video from the second week will come later since I didn't finish it yet. I hope you enjoy it.

Hi
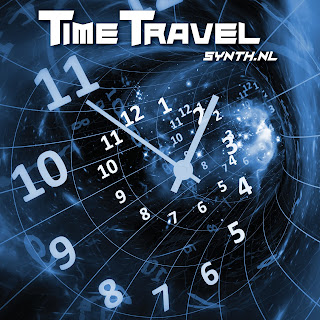
everyone. I'm happy to inform you than Ron Boots has finished Remixing
and Mastering my TimeTravel album. The artwork is done and CDs are being
produced as I write this. You can already pre-order the CD is you want a
physical product directly from Groove Unlimited (my record label). They
will send the CD out as soon as they arrive from the factory and you
will be the first to have it. The album will also be available as a
download later on both from the Groove Unlimited download shop and from
BandCamp including the artwork. The download will be available as 48 Khz
24/32 (not sure yet) Bit as well. You can order the CD on this URL: http://www.groove.nl/jump2.php?artiest=synth.nl
I will update you as soon as the album is officially released with the
other buying options. Thank you all for your continued support.
 I have exiting news. The BorkHavn album I released together with Ron Boot is nominated for the Schallwelle Preis best album of the year 2020. We are in the top five which is pretty nice of course. People could vote on their favorite album on their website so I'm very honored that you chose our album. Thank you very much! Now a jury will decide I guess. Normally there is an award ceremony in Germany but because of Corona it will be done online now. You can read more about the award and the other nominees on this website: https://schallwelle-preis.de/. And in case you didn't know. My albums 'OceanoGraphy' and 'Apollo' did win this album of the year award in the past. So be sure to check them out if you haven't heard them. So fingers crossed :)
 The external 12V power supply brick has arrived. So I could finally finish the Deckard's Dream. First thing I did was again test all the voice boards individually. They all worked fine. I labeled them so that I know which board is which because they all have their individual tuning. Then I inserted them into the main board and attached them to each other with the spacers as you can see in the picture on the left. I was a bit surprised I had spacers in different lengths but it turns out that the distance between all the slots is not equal. I didn't expect that but luckily I had all the correct spacers in the parts kit. If I had ordered them myself I would have probably ordered all the same based on the first gap :)

And then an exiting moment. Testing the whole synthesizer. In this picture you see everything that is inside. Starting from left to right with the front panel, the hardware PCB sandwiched to the main PCB. The inserted in the Main PCB first the Power Supply board and the 8 voice boards. In the right bottom you see the output board and in the top right the external 12V 6A power supply brick. All tests went flawless and then I uploaded some patch banks I found online 4 banks in total, one of which hold some recreated Vangelis sounds. They sound so awesome :) I ended up playing a long time with them just with a little midi keyboard and my headphone on. Even without any effects. But I had to stop just there and do the last remaining bits. Everything still had to fit in the case. In the back of the case is a fan for cooling that should not be necessary but I installed it anyway. Luckily you can switch it on and off from the settings menu. So I'll start with it switched off and see if the Decard's Dream wont run hot in the studio.

Then you have to put the IO board in the back and attach the flat cable to it. The IO board is just attached to the case with the rings of the jack plugs for audio input and output. The fan is attached to the IO board with a connector. It is all vert well thought of in my opinion. So after putting it in the case again I tested it one more time and again I ended up playing on it for way too long. But last step left was to put it in the studio. I did leave room for it of course :)

 While waiting for the new external power supply I did something useful as well besides playing on the synth with 4 voices. I decided to put on the colored slider caps. Actually I wanted to wait to that it as a finishing touch when it was done, but I couldn't wait any more. I even read the manual since I didn't really understand what all sliders did, but it all makes sense to me now. Unfortunately the package with the power supply was delayed so more waiting .....

The next useful thing to do was put on the cooling blocks on the power supply. I was a bit surprised that everything so far was in the parts kit I bought from synthcube but not the m3 bolts for screwing these on. Luckily that is stuff I always have lying around at home. After that I started twisting the wires for the power supply. I did read that putting on these cooling blocks is not necessary when you change to TL062 and TL064 because the Deckard's Dream draws less current because of these and get less hot, but I decided that it wouldn't hurt either. More cooling is always better with electronics. I also took the rest of the case and started looking how everything should fit together. And then I found out the main board didn't fit in the case. Luckily there is a clear instruction about this on the build website. There is a 5 mm strips on both ends on the PCB that you can break of. There is a line cut into it to make that easier but I did it very carefully with some pliers trying not to damage anything on the main PCB.

 In the previous part I already said the Decard's Dream was coming alive. I had a menu on the display. Here is a picture of the display and knobs. I already put on the volume knob as well. The display is small but very high resolution so it is readable, but I do need my glasses for that :) So first I scrolled through all the settings to see what is there. I did find some interesting settings that I will try out later. But for now I especially want to know if everything works. I could not find a good test procedure on the build site so I started googling to see what other people did. And apparently it is a good idea to start testing all the knobs and sliders.

There is a special option in the menu to calibrate the sliders first. There are a number of sliders with a dent in the middle position. They go both up and down. Pitch course and fine. Balance between oscillator one and two, overall brilliance and the keyboard control sliders. You have to set them in the middle position before you start calibrating. Then there is a special option in the menu called 'debug' with this you can test all the sliders and know one by one. It reads out the value from 0 to 255. But I did see some stepping while doing this. I was a bit surprised. But I will figure that out later. For now all sliders seemed to work.

Nest thing to do was connecting the IO board back to the main board. It is connected via a flat cable. Here is the main output (mono) and also the midi connectors and the usb connectors. I hooked it up with USB to my notebook and then you get midi over USB. Next thing up was testing all the voice boards. I inserted a voice board in the first slot next to the Power Supply boards because I assumed that was the first slot. Then hookup up a midi keyboard to my notebook and used Midi-OX to connect the keyboard to the Deckards Dream. I expected to get some audio even though I would assume it would be out of tune or something, but nothing happened :( Then I read on the forum that you need to calibrate the voice boards, so I went in the menu and selected that option. Nothing happened. Like it didn't see the voice board at all. So i tried another voice board and same problem. I started panicking a bit and posted on the forum. But I was impatient for as answer and they I saw I made a very stupid mistake :) The slot next to the Power Supply board is actually slot 8 and now 1 :/ Duhh..

 Next thing to do was connecting the main PCB to the hardware PCB. After that I also did a quick power test and again the magic smoke stayed in :) I had some trouble determining how to mount the oled display so I didn't solder that yet. There is not much information available unfortunately about the mechanical construction of the Deckards Dream. I did look at some pictures online but still I didn't know for sure. So it was time to also screw on the front panel to see how it all fitted together. At first I had the spacers wrong so that the front panel was too far away. So this is a picture after the second attempt. And now I could also finally solder the oled display.

And then it was time for yet another exiting part of the whole build. Finally putting some software in the Deckard's Dream. You do need to buy a ST programmer for this and connect it a flat cable to the main PCB and with USB on your computer. You can freely download the programmer software. It did see my programmer right away and they you hit 'connect' to hook it up to the main PCB. There is actually a micro controller on the PCB. It is kind of a mini computer that controls everything and it needs software to run. You can download the 'bootloader' software from the Deckard's Dream build page and then you hit 'program' and it actually worked :) I got a success message. After this you disconnect the programmer and switch the Deckard's Dream of and on again. Some garbage appeared on the oled display. But then the manual said to hold the 'shift' button to boot it in USB mode. So I did and then the Deckards Dream acts as a USB drive and you can copy the firmware and factory sound banks on it. Reboot again and voila ! It came alive :) I had a working menu on the oled display.

Here is another picture of the backside where you can see the sandwich of the main pcb the hardware PCB and the front panel. You can also see the correct spot and orientation of the Power Supply PCB in this picture. The only thing I find strange is that all the boards will be connected together in the end. I don't know how yet at this moment, but I'm sure I'll figure it out. There are all hanging horizontally though in the cart-edge connectors without any fixture. So that is a bit surprising to me. But we'll see later about that.

 Like I said in the last part it was time for some testing. I did a visual inspection of all the boards and could not find anything that seemed wrong. The only thing is that there was an error found on the output PCB. Once of the Capacitors was actually wrong on both the PCB and the schematics. So before testing I decided to desolder it and turn it around. After that I attach the power supply to my lab power supply and applied 12V to it. The nice thing about a lab power supply is that you can limit the current it gives so I slowly turned up the current and the power supply lit up and all voltage led were OK. After that I measured all the voltages and everything was fine :) No magic smoke this time :)


After this I did another modification on all the voice boards. The advise was to solder two 1 mega-ohm resistors on the backside of the voice boards. It has something to do with the glide function and making it more like the behavior on the original CS-80. You have to be very careful here you solder them to the right pins of course which is a bit more difficult to see from the back side. But luckily there is a clear picture on the Decard's Dream build page. After this I compared them and actually I made a mistake on one board I had to correct.

 The last board I had to do is the Hardware PCB. This is basically the 'human' interface of the synthesizer. It holds all the knobs and sliders and the display. Again the first thing to do is solder all the SMD capacitors. You need to apply flux first if you want the solder to flow under the components connecting surfaces. I have become quite handy by now, but I do need some magnifying glasses to see everything. Age isn't helping me here :) My eyes have been better in the past.

On this board there are also components on both sides. So you have to watch carefully for that. Eventually this board will be hooked up to the Main PCB they will be connected with the two double header connectors you see on the right. I did try if it fitted and it did so I guess that is OK. There are also some resistors and IC Sockets that go on the back side.


The next board I made was the IO board. This board takes care of the communication of the Deckard's dream with the outside world. The audio and midi connectors are on here, the power connector and also the USB connector. There is small SMD chip you have to solder on here and I was very confused about the orientation of this IC. So I asked on the Muff Wiggler forum and got some advice, but I'm still not 100% sure it is correct. I also read something about the Capacitors being wrongly oriented on the PCB and in the schematics. I guess I will have to be care full and do some measuring before I hook it up.

Another important board is of course the Power Supply. I still need to fix the cooling blocks but further this is not a very difficult PCB to create. The downside is though that it sticks in the same slot on the main PCB as the voice boards and you definitely do not want to mix them up. There is only one slot where the Power Supply should go. I also got the advise on the forum to test all the boards separately and the same goes for the Power Supply. Better test them all first with as less components inserted as possible. Also first test the PSU on the Lab Power Supply where you can limit the current to make sure you don't have any shorts.

 After soldering all the capacitors on only one thing is left and that are all the IC sockets. After that I did a careful inspection for the orientation and checked for missing components. As you can see if you inspect the picture closesly there are some resistors not in place. So I started reading on that and it turns out this is meant to be this way. They were put in by the designer to have the possibility to do some changes to the filter afterwards in case that was necessary without having to design a new PCB. I didn't put in the IC's yet. I read on the Muff Wiggler Forum that it is better to test the PCB for shorts first and then put the IC's in later. So I decided to do that as well. It is always a good feeling when you finish a PCB like this, but then also the worrying starts if you made no mistakes. But we'll see about that later. I followed the instructions closely so at this point I can't see what could have gone wrong.

And then 7 more of these boards to go. Here is a picture when I finished three of them. After the first one it usually goes faster. I could finish a complete voice board one day actually. Creating all the voice boards took me about 10 working days where I also did some other work in between. My girlfriend also helped comparing the boards to see if they were all identical. And so far we could not find any differences between them. So so far everything looked great.

 If you follow my blog you know I like to build my own synthesizers. Unfortunately due to my divorce I had to sell a lot. Also some of my DIY stuff. But as you know after 2,5 years I have a small studio again. Luckily I still had a DIY kit that I saved. It is a Deckard's Dream which is actually a clone of the famous Yamaha CS80 that was heavily used my Vangelis one of my favorite musicians. I did have a CS60 in the past and that came close. So I'm really looking forward to this synthesizer. But the build is a lot of work and not the easiest to build. First thing up is build the 8 voice boards. In the picture you see the back of the first one. You have to solder a lot of very small SMD capacitor on there to begin with. I never really did that and my eyes used to be better ;) So that was quite a challenge.

After that you start with the resistors and diodes. There are a lot actually and you need to pay attention to the correct value going in the right spot. Usually it is quite a puzzle, but luckily some made a build document that made life a lot easier. It is divided with a drawing that highlights all the resistors of one value and where they need to go. That actually saves a lot of time and mistakes. And one thing I learned myself is using to multi meter to measure the resistor values before I put them in and not rely on what is printed on the bag you buy since sometimes the supplier makes mistakes too. It is a lot of work, but actually I find this work very therapeutic and relaxing :) So I don't mind.

After This the capacitors go on. Just like the diodes here you have to watch the orientation too. Getting this far for the first board was about a days work. So time to stop and also the sun light was going away. Unfortunately I don't have very good lighting in my temporary work place which is actually the dinner table in our living room. So time to call it quits.
And already I'm worrying if I didn't make any mistakes. But I decided to build the 8 voice boards one by one so when they are finished I can compare them to each other. It would be weird if I made the same mistake 8 times over. But well you never know ;) I will update you with part 2 soon.


Today is the day. After 7 years I finally have an official release again. 8 years ago Ron Boots and myself went on a family holiday in Denmark and took some synthesizers and notebooks with us. During the day we enjoyed the nature with our families and did some nice stuff and in the evening Ron and myself went in the small improvised studio and started improvising on our own. All music on the album was recorded live and was improvised in that holiday house. 8 years later we picked the best parts and finished them in our studios and eventually did the end mixing in Ron's studio and Ron also did the mastering. I did the artwork. The music is a bit more modern film music than classic EM we think, but judge for yourself. You can listen to some excerpts on my website on this URL: https://www.synth.nl/borkhavn and you can also listen on bandcamp here: https://synthnl.bandcamp.com/album/borkhavn. You can also buy the album there as MP3 or FLAC. You can also buy it directly from Ron's record label Groove Unlimited from these links.
Physical CD with Jewel Case: http://www.groove.nl/jump2.php?artnum=GR-299
FLAC download including all the artwork: https://shop.groove.nl/gr-299-flac
MP3 download including all the artwork: https://shop.groove.nl/gr-299-mp3
I hope you like it. Let me know if you have any question.
 I'm sure you all remember the famous 'Apollo Studio' pictures that still roam the internet. Well that studio is gone :( As you might well know I have gone through a rough period with a nasty divorce and I abandoned everything. After 2 years I moved in with my new girlfriend Sonja in her new apartment in Rotterdam. I did manage to save some stuff during the divorce. Some stuff is put in long term storage like my Eminent 310, V-Piano and Roland Drum Kit and some synths, but I could bring some stuff to the new apartment and build a small studio again. I always name my studio's and I call this studio my 'Jurassic Studio'. For several reasons. First of all it feels like traveling back in time for me, but secondly I'm currently working on a new solo album about dinosaurs. So now that cat is also out of the bag :) I hope to release it somewhere next year.


