Showing posts with label digital. Show all posts

22 December 2013

New Mutec Word Clock Generator

 I have a lot of digital out board gear that needs to synchronize. For this I use Word Clock. So far I used an Apogee Big Ben to generate and distribute the clock signal, but it has only 6 outputs. This means you have to make a lot of loops and terminate them. Recently I had some trouble with my clocking and it looked like a loose terminator or connector, but go find that :( I could solve it by fiddling around at the cables, but this was only a temporary solution. So I decided this was one of the first things on my list to solve with the studio rebuild.

At first I looked for an extra distributor to replicate the Big Ben's signal, but eventually I chose to replace it by this Mutec iD + iD dp. I already had some equipment from them and it is really good stuff. This clock generator has 16 Outputs! This meant that I could seriously avoid looping the signal though several chains, but that I could attach more equipment directly to this clock generator. Today I decided to remove all BNC wires from the Big Ben and put this one in. As you can see in the picture it is in the same spot now.

And here is what I was left with after the operation. I replaced all cables by version that were as short as possible and removed as much T-connectors and terminators as possible, since they are usually the source of all clocking connection troubles. Where possible I used the internal 75 ohm termination of the equipment itself. Most digital equipment has a switch to select whether you want termination or not.

And here is the good old Big Ben on it way to someone else. I already sold it. It is a good machine and it has helped me trough several album recordings, but for me 6 outputs is not enough. They really should consider making a version with more outputs.

After I hooked everything up again and checked if all equipment was synched to Word Clock again, I did some testing and was curious if I could hear any difference. It might be my mind playing with me, but I had the idea the sound was a bit brighter than before. But the problem is with these kind of things that you can't really be objective. But the most important thing is everything works again and is clocking like new :) More updates soon. For today it was enough of a job :) You can find more information on Mutec here: http://www.mutec-net.com

10 December 2011

Building SammichFM DIY Video

This year I build a Wilba SammichFM DIY synthesizer kit. It is based on the famous Yamaha OPL3 sound chip that was also used on the famous Sound Blaster Pro 2.0 and SoundBlaster 16 ASP sound cards. It is a 4 voice FM synthesizer that sounds a lot like the famous Yamaha DX series. During the construction of the synthesizer I filmed the whole process. This movie is an excerpt of the 4 hours total build time. I made the 3D animations myself in Cinema 4D. The music you hear in the background in a track called 'Thermosphere' from my 'AtmoSphere' album that I released in 2008. More information on the album on http://www.synth.nl/AtmoSphere.

05 December 2011

One set of MB-6582 knobs left!

A while ago I build a Wilba MB-6582 synthesizer kit. I was too late for a group buy and had to buy a full bag of knobs for myself. In the mean time I have sold a large part of the remaining knobs and today I'm sending away another set of them. I just counted my knobs and I still have one set left. So be quick if you need these knobs, they are hard to get by in small numbers. If you are interested just send me an E-mail and I'll make you a nice deal.

17 November 2011

SammichFM (Part 7)

The next step in the process of building the SammichFM is the painting of the letters for the front and back panels. The idea is that you put paint on the paper that is on the panels and then peel it of to reveal the letters. Somehow that is not really my thing :) I always end up having paint everywhere. Maybe I'm to impatient I don't know. But somehow I also do manage to get it of with some thinner and don't screw up that bad, so it kind of looks OK I think.

The most tricky part is that the inside of letters like 'P' stay on when you peel of the paper and you have to get that of somehow and if the paint is not completely dry yet, you smear it out. Ah well now you are warned at least ;). On the right is a picture of the back panel. As you can see it has two audio outputs. You can assign any of the four parts of the synthesizer to an output, so it is a real multitimbral synthesizer actually. Quite  more than I expected when I started to build it.

And here is a picture of the fully assembled and fully operational end product. The SammichFM :) On top you can clearly see the buttons to select the 4 parts of the synthesizer. So you really get 4 for the prince of 1. Looking back on this project I think it is not a beginners project. Especially the soldering of the SMD components is quite challenging and not suitable for anyone without proper soldering experience. The rest is fairly simple, so maybe get some help if you want to build one for yourself and you are not so experienced.

And here is one final picture: a nice family portrait. On the left is the SammichFM and on the right its sister the SammichSID. Nice shot I think :) I personally like the blue leds and blue backlit display better on the SammichFM. But to conclude this series: These synthesizers are very similar in looks, but very different in character. The SammichSID is way more analog sounding and fat, but the SammichFM is very complementary I think.and they make a nice set together. OK now I'm going to work on the movie and hopefully I'll be able to show that any time soon.

15 November 2011

SammichFM (Part 6)

In the last post I was at the point that the MIOS booted OK and now it was time to take it to the next level and program the software for the SammichFM. To do this you hook it up with the Midi input and output to your PC and run an application called MIOS studio. It actually talks to the processor of midi. It didn't work to begin with and after a few minutes I found out that one jumper on the main PCB was in the wrong position. After changing this the software was uploading alright.

The uploading of the software doesn't even take that long, but after that the SammichFM reboots and at first boot it starts to format it's memory banks. Since there are quite some installed by default that process takes a little while. Then finally after that you have a working synthesizer. So the big question was if it would actually produce sounds as well. I still was not sure about the soldering of those SMD components.

So I hooked up a midi keyboard and it worked! :) Always a very satisfying feeling when you can actually play on a synthesizer that you just build with your own hands. There was just one odd thing, there was only one preset in there. After reading a bit in the documentation I found out quickly that this was normal behavior and that you had to put in the factory presets by uploading a sysex file to it over midi. So I did and had some fun with it. It is a nice polyphonic synthesizer and it sounds very .... FM like :) Reminded me right away of the Yamaha DX series that were very popular in the 80's. All in all a very musically usable machine I think :) OK. Enough for today. Next up is to finish up the enclosure. Coming soon!

13 November 2011

SammichFM (Part 4)

The next step in the building of the SammichFM is to solder all the components on the front panel PCB's. In this picture you can see all the IC sockets, switches, transistors, resistors and capacitors already on the PCB. Actually this is a quite straight forward job. Only on the bottom two right switches you have to cut the leads very short, because otherwise they would touch the heat sink of the power regulator on the base PCB when the whole synth is assembled. Something not to forget.

Then you have to put some spacers on the PCB again. This time to put the front panel in place in order to solder the leds in place. By putting the front panel on, you can stick the leds through the holes simply by turning everything upside-down. Then the leds fall into their intended positions. Because the whole thing is upside-down the leds can't fall out anymore and you can solder them on the bottomside. A simple trick but very effective. Everything looks good.

After this the PCB's are done and it is time to do some power tests, just to see if there are no short circuit. Everything turned out OK, so I put in all the IC's. Basically the electronics part of the project is done now, so it was time for the famous 'smoke test'. I put power on the construction while holding the upper PCB up so that nothing touched each other. And they after applying power feel the IC's to check if they get hot. Well no temperature and no smoke. So all looks great.

And here is a final picture with both finished PCB's. So far I still filmed the whole process and I'm into 3 hours of film by now. Which means I build the whole thing effectively in three hours, but of course over a period of a couple of days. Usually I spend about an hour a day working on a project like this. The next thing will be to assemble the whole case and test the synthesizer. I'm very curious if it will work of course. I'll let you know soon!

11 November 2011

SammichFM (Part 3)

Next up was installing all the electrolytic capacitors. You have to pay attention here since their orientation matters. One leg is clearly longer than the other and the long leg is always the + (positive) side. In this picture you can see a little pile of them (green) between my tools. Maybe a nice moment to point out that is is the minimum of tools you would need for such a project: multimeter, cutting pliers, holding pliers, de-solder pump,some screw drivers and a soldering iron.

Here you can see the capacitors already on the PCB. As you can see most of them lay flat, so you need to bend the legs for those, and two are mounted standing up. On this picture also the connectors are already installed: Two midi connectors, two audio jacks, a power connector for the external 9V power supply and a Commodore 64 style power switch. On the front right is also a crystal install. I did solder that too quickly so it is not so neat on the PCB, but it'll work.

The next step is a tricky one. You have to install the big power regulator with two heat sinks. The whole construction has to be put on top of each other with heat pasta in between. That stuff is nasty and stick to everything, so you will have to practice the assembly first without the pasta and when you got the hang of it you do it one more time with the pasta on and try not to get it on your hands, cloths and the rest of the PCB. As you can see I did OK ;)

And then it is time to fit the LCD display on the front panel PCB. For this you have to put the spacers between the PCB's and put the connectors in place. Only like this you can solder them in the right height. The tricky thing though is that you can solder the connectors on the base PCB from the bottom, but you will have to solder the rest from the top, since you can't reach the bottom of that PCB this way. Once everything is soldered you can cut the leads and take the whole construction apart again.

10 November 2011

SammichFM (Part 2)

The next task in building the SammichFM was to install all the resistors. As you can see they are all 1% resistors and I always find it challenging to read the color codes on those. You easily mistake a 1K for a 10K resistor, so I tend to measure them all with a multimeter. Just to be sure. Luckily the resistor values are written on the PCB of the SammichFM, so it is easy. So measure a resistor and look for it on the PCB. You don't even need a part list for this process.

After the resistors it was time for the IC sockets Nothing difficult about that. The only trick I always use is to hold them with one hand with the PCB up-side-down and solder just one pin on the edge with the other hand. Then I look if it is in straight and if not I reheat just that one pin and readjust it. When you have already soldered multiple pins that is almost impossible. Then I solder the diagonal opposite pin (furthest away) and check again. After this you can solder the rest, since the socket can't move anymore.

Then it was time for the capacitors. And also a ferrite bead, a crystal and two diodes. Especially for the latest two you need to pay attention because their orientation matters. So far all the components are very flat and in this way you can easily roll the PCB over and solder on the bottom side. This, of course, is also the reason why you should solder in your components in this order. If you start with the highest components you lose this advantage.

And here a final picture of the OPL3 chip more up close, just because I thought it was a nice picture :) You can also clearly read the text on it. The PCB is full with little 'Easter Egg' jokes by the way. Wilba must have been in a very funny mood when he designed it, but I enjoy them while working. Not everything in life has to be so serious. I'm also still filming it all and it looks like I'll have enough nice material later on. In the mean time I've put my camera on permanent power, so that an empty battery won't spoil the fun again. Next post coming soon!

09 November 2011

SammichFM (Part 1)

Today I started a new DIY project as well. I'm going to build a SammichFM synthesizer. Like the name suggests it is a sister of the SammichSID, but this time not based on the Commodore SID chip  but on the Yamaha OPL3 chip (also know as YMF262). This was also a famous sound chip from the 8 bit computer era. It is a 4 voice stereo FM synthesizer. It was used on several famous sound cards like the Sound Blaster Pro 2.0 and the Sound Blaster 16 ASP.

The first task in building this kit is right away the most challenging one as well. The sound chip and 4 other components are so called SMD components. SMD components are surface mounted which means they don't have leads sticking through holes in the PCB, but they rest flat on the PCB and you have to solder the pins to pads on the PCB surface. These pads are very small and very close together. I did need my glasses for this and a magnifying glass to check if I did everything right afterwards.

Wilba was so nice to put some flux in the kit to help improving the flow of the solder. That made things a bit easier. I did solder some pins together though. (It is almost undo-able not to make this mistake by the way) So you need some means to remove excessive solder as well. I used my de-solder pump for this. But in the end I got it right. In the picture on the left you see the remaining parts that I still have to put on there. But those are all conventional 'trough hole' components, so that should be a lot easier :)

Next to taking picture for my blog, I'm also filming most part of the construction of the SammichFM. So hopefully I can show you a nice video as well when it is done. Only during my work I'm not paying much attention to the camera of course and today already the battery ran out during filming and I didn't see that until after I had put on all the SMD components. I just watched how far it filmed and I have enough I think to show the process, even though I can't film to close but I guess you'll get the idea. OK enough for today. I'll continue this project soon and I will post updates on this blog from time to time.

SammichSID Repair

Today I heated up the solder iron again. It was a really long time ago that I used it due to all kinds of other projects. The first thing I wanted to do today is repair the SammichSID. I had been laying disassembled on my desk for a long time and I always worry then that parts might be lost. I found out earlier that it was behaving strangely because two leds didn't function properly. Actually this is the first time in my life that I encountered leds being broken, but apparently it can happen.

Luckily I was able to buy the exact same leds on E-bay from a shop in Hong Kong. Otherwise I had to replace them all. First I cut the leads of the old leds and tested them while out of the PCB. They still didn't work so my diagnose was right. I de-soldered the cut of leads from the PCB and then put in the new ones. After that I tested it and everything was fine :) I also upgraded the SammichSID to the latest OS and then couldn't resist playing on it for a while. The sound coming from those Commodore SID chips is still something special for me :) OK. At least I could take one point of my todo list again today :)

05 November 2011

Rob Papen visits Synth.nl Apollo Studio Video

A while ago Rob Papen visited my Apollo studio. Together with his crew he was filming some footage for his upcoming book and DVD about sound design on synthesizers. While they were filming in my studio I filmed them with my own camera. So this short movie is sort of a 'making of'. More info about the DVD will follow on http://www.robpapen.com. I made all the 3D animations in this movie with Cinema 4D. You can watch it here:

31 October 2011

Korg Kronos and Roland Jupiter-80 in the Studio

When I visited the Musik Messe in Frankfurt last year, there were two new synths being presented: the Korg Kronos and Roland Jupiter-80. I saw and heard the potential of these two monster synths directly and ordered them right away on the way back home. It has taken a while and I had to sell some stuff beforehand to make room in both the physical and financial sense, but finally they arrived. Never did I wait so long for something to arrive, but I'm sure I won't regret it. I'm still busy with a release that needs to be done in a week, so I haven't gotten much time yet to play with them, but looking through the menus is very promising. Both synthesizers have one thing in common though: The factory presets are very bad. I really don't get why manufacturers do that. Always the same standard sounds :( Well that does leave room for creativity I guess. I already wrote a little review about the Jupiter-80 before on my blog, but now I can finally compare it to the Kronos as well.

The first thing I noticed when I turned on the Kronos is that it has a noisy fan :( I don't like that at all. Another thing is the build quality: compared to the Jupiter-80 the Kronos feels like a toy. The knobs are very cheap. The keyboard of the Jupiter-80 on the otehr hand plays like a dream and it feels like a tank. I can't say the Kronos keyboard is bad, but the Roland is more my thing. In terms of sound they both are fat, but the Kronos is obviously more versatile with it's 9 different sound engines and much more modulation options. The Jupiter sounds a bit bigger though in my opinion, but I have always preferred the Roland sound so I'm biased I guess. I really can't wait to start programming my own sounds on both of them, because the possibilities are there for sure. I'm very sure you will hear the both of them on future albums :) I'll write a bit more about them in the future when I have more hands on experience.

07 September 2011

Synthesizers and Effects used on Apollo

Usually when I release a new album I get the question what synthesizers I used and most of the time I don't remember, but now I think I do ;) So here is a list of the synthesizers I used to create the upcoming Apollo album and also a list of the effects that were used. OK here for the synths: ARP 2600, Elka Synthex, Moog Minimoog, Moog Memorymoog, Moog Taurus III, Moog Voyager RME, Roland Jupiter 8, Roland System 100m, Roland SH-09, Roland SH-5, Roland V-Synth XT, Roland V-Synth GT, Roland GAIA, Korg Radias, Korg M3, Access Virus TI Polar, Nord Modular G2X, Waldorf Microwave 1, Arturia Origin,Anywhere Instruments Semtex XL, Alesis Andromeda A6, Eminent 310 Unique, Novation Ultranova and a Acid Lab Miami drum machine. I also used some software synthesizers.

All songs were recorded and arranged in Cakewalk Sonar X1 Producer Edition. Recording was done using Lynx Aurora 16 AD converters and RME MADI interfaces. I used quite some effects from my UAD-2 bundle, but also these hardware effects where used. Bricasti M7, Quantec Yardstick 2402/F, Eventide Eclipse, Eventide H8000, Eventide 2016 reverb, Lexicon PCM96 surround, Lexicon PCM91, Sony DPS-V77, TC Electronic Fireworx, Korg SDD-3000, EH Electric Mistress and AKG BX-15. The mastering is being done in Steinberg Cubase 6.1 and Audiofile Wave Editor on OSX Snow Leopard by my friend Hans Landman.

I hope this answers all questions up front and if not do feel free to ask. I'd be more than happy to answer your questions.

29 August 2011

Kurzweil PC3 in the Studio

Last week I bought a Kurzeil PC3 synthesizer. I have a Kurzweil K2600R and I love especially the strings coming from it, but since it is a module and it is stacked away (and makes a lot of fan noise) I don't use it often. All those sound and some more now are in the PC3 series and you can also easier edit the VAST synth engine since the 2.0 software update. It does like Kurzweil is coming up with something new soon, since the prices have dropped dramatically on the PC3's. It looks like they are being dumped. I decided to go for a 76 keys version with semi-weighted keys. The first synthesizer I actually have with semi-weighted keys. I put it in a nice spot where I can play on it easily in the studio, just between my Yamaha SY-99 and Waldorf Wave 2, which is broken by they way :( So I would say check your local store out you might be able to get the PC3 very cheap as well and I can tell you it sounds awesome :)

10 August 2011

Testing the Roland Jupiter-80

At the moment I'm testing the new Roland Jupiter 80. Thanks to Live Music in Arnhem (NL) and Roland. I heard it briefly at the Musik Messe in Frankfurt and I was already pleasantly surprised then, but now that I'm able to play with it myself I'm totally convinced that it is a synth for me. Like I said before I'm not very into the acoustic sounds, however I did enjoy playing with some of those sounds a lot. Like the piano and violin sounds. But my main interest is the VA engine and now I'm sure it sounds like the GAIA engine (which I personally like a lot), but not 9 of them like I wrote before, but 10 actually :) You can even load a synth engine on the percussion part. So that gives a total of 30 1 oscillator synthesizers stacked all together. It is amazing what kind of power and movement you can get into your sounds. Each 1 oscillator synth has its own filter, VCA, LFO, envelopes etc. So imagine stacking that on top of each other 10 times in a single preset :) Bass sounds can have a lot of punch and low end, but you can also get screaming leads from it. But I think it excels really at string and pad sounds. From soft and mellow to grand and wide. That is what I'll be using it for most of the time I guess. Further more the build quality is excellent, the whole thing feels very solid and the keyboard and touch screen are excellent. I like the playing feel of the keys a lot. My kind of thing :) So I would say try it out! Stop whining that it is called Jupiter and that it is not analog, and don't judge it on the acoustic preset demos on YouTube demos with crappy audio, but find a real one and make some sounds yourself instead before you judge it! I'm happy and sad now actually. Happy that I could try it out a bit longer than in Frankfurt but sad that I'll have to return it in a couple of days. Mine is already ordered now and I'll wait impatiently until it is here :)

03 August 2011

Apollo Studio Changes

Last week I got back from holiday and I wanted to get back to my music, but I'm having serious jet lag troubles. I'm very tired and I can really focus unfortunately. I'm sure it will pass in a few days, so I started doing some little studio changes. I recently sold quite some stuff to be able to get some new synths soon. One of the things I did was sell most of the stuff from my mobile modular rack. I only kept the Semtex XL that I put in the modular desk now as you can see. And on the spot where the mobile 19" rack used to be I could now finally put my ARP 2600. So now it has a decent spot where I can play on it and it is also next to my modular desk so that I can patch it to the other synthesizers. I had this in mind for a long time already, but just didn't find the time. Well now it is there I'm quite happy with it.

I also found a new spot for the Blofeld module. I removed the front cover from the Arturia Origin and that just gave me enough room to put it on front of it. So now it is finally on my desk within reach. I'm sure this won't be the final way I set my desk up, but for now it will do. The next major update will be the addition of some new synthesizers. From the stuff I sold I'll buy a new Korg Kronos and a new Roland Jupiter 80. I have ordered them a long time ago, but I'm still waiting for them. I hope to get them soon and then I'll let you know right away of course :)

09 April 2011

Roland Jupiter 80 Preview

The last two day I was at the Musik Messe in Frankfurt Germany. I was there together with my friends Hans and Eugene and we had a great time. There were two new synths on the Messe that I was very interested in. The Korg Kronos and the Roland Jupiter 80. Unfortunately we didn't get to play on the Kronos, but Roland CE was so nice to give us a private demo of the Jupiter 80 and we even got to play with it ourselves. I had read a lot of things about it before we left. Most people start with comparing it with the Jupiter 8. Well I can tell you it has nothing to do with that classic. So forget that association right away! If you are looking for a Jupiter 8 buy a Jupiter 8 ;) Some people also call it a rompler. Well it is FAR from that either. Roland pushed the marketing especially though with their Super Natural technology. And I can tell you it does sound great. You get very realistic piano's, guitars etc. It also holds something that resembles the AP technology from the V-Synth GT. It plays a natural legato like effect in between notes when that make it sound very real. It is emulating the playing style on these acoustic instruments. I love that in the V-Synth GT, but there you can also combine it with the synth engine.

OK Cool thing with the acoustic instruments, but to be honest I was not interested in that so much. When you know my music you know I don't use much acoustic sounds. So I was especially interested in the VA synth engine. And I was very pleasantly surprised by that. The VA engine is much like the one in the Roland GAIA. And I already liked that sound a lot and also the layout of it. In the GAIA you have 3 one oscillator synths that you can stack all with their own LFO, Filter, VCA, two envelopes and an effects sections. Well you can stack 8 of those in the Jupiter 80 without any polyphonic restrictions. So that gives you 27 one oscillator synthesizers in a stack :P I can tell you the sound power coming from that is amazing. You can also create sounds that are so incredibly alive. I just loved it. The GAIA has some restrictions when you use oscillator sync for example the synth goes monophonic. Well you don't have these restrictions in the Jupiter 80 we were told.

You can also chose to combine the VA sounds with wave sounds or the super natural technology. The synth has four sections. Drums, Solo, Upper and Lower. In both upper and lower you can stack 4 tones. And a tone is like a GAIA or super natural sound. In solo you can use one. You can stack them or make keyboard splits to play those sections on different parts of your keyboard. A very cool feature is that you can use the highest not you play always on the solo section. You don't need to set a split point for the lead sound then. It is not a workstation by the way like the Fantom and we heard this synthesizer doesn't share any technology with the Fantom either. Everything is newly developed. I must say it sounds great and I was really impressed. I will buy one for sure. I just think it was badly marketed so far by Roland. The Jupiter name gets a lot of discussion going and I'm sure Roland did that on purpose. Even negative attention is good marketing because everybody talks about you. Analog synth purists won't like this machine for sure, but I don't care. I liked it a lot :) Thanks again Roland for the demo!

05 March 2011

M-Audio Venom and Blofeld module

A while ago I sold myWaldorf Blofeld module to get a version with keys and now I did it the other way around again. It was a stupid move moneywise of course, because I lost some money in the sale twice, but I had to make room for something else and the Blofeld was the only synthesizer I could trade back again for a module version without losing those sounds. A well those things happen. In the back of the Blofeld you see the UltraNova by the way. I hope they will make a module version of that one too in the future. I can't seem to find a nice place for the keyboard version either.

Well and here is the synthesizer I wanted to make room for. It is the new M-Audio Venom. I just picked it up today and played for a very short while on it. I don't have much time unfortunately now, since I'm struggling to make the dead line for my new album. But skipping through the presets was pleasant. It sounds quite refreshing :) And new sounds mean new inspiration! That is always good news. OK now back to work ;) I'll try to send another update on Apollo soon.

24 December 2010

Novation UltraNova in the Studio

Since the financial crisis not many manufacturers dared to invest in a new synthesizer it seems, but Novation did. They just released a new synthesizer called the 'UltraNova' based on the sound engine of the famous SuperNova's. It is a virtual analog synthesizer with some wavetable like stuff as well and the price is very OK. When I saw that it also has SPDIF and USB and a VST that you can use from your sequencer I could not resist to try it out.
To start with the sound is great of course, but I didn't not expect anything less from Novation. But I love the VST even if it is still version 1.0. Here you can see it on the left. It only communicates with the UltraNova over USB and doesn't not send audio back like the Virus TI. That would have been really perfect, but this is really good as well. If you change preset on the synthesizer itself it also communicates back to the VST and of course you can save your presets with you song. And I really love those things :)
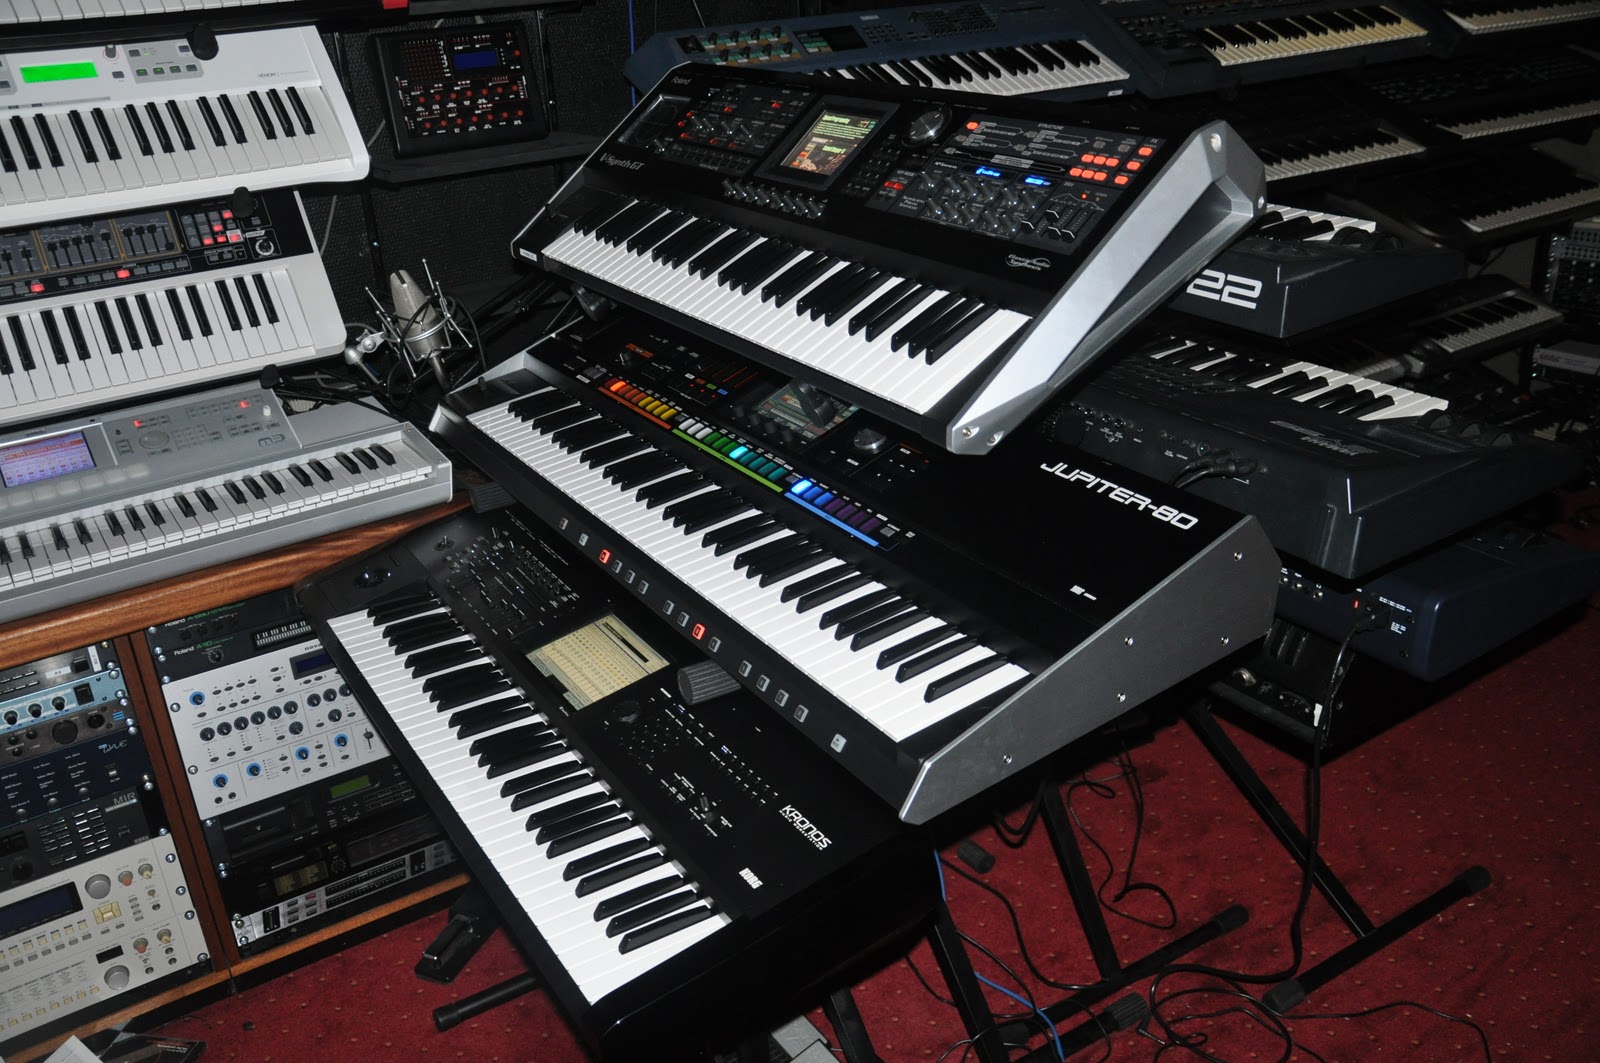
And I can already hear some of you think. That an awkward place you put that synthesizer in. Well yes, my studio is kind of full and because of this total integration I feel no need whatsoever to play on the keyboard of the UltraNova. I can play on it from any other keyboard in my studio and preferably from my master Midi keyboard that is right in front of me. But in the spot it is standing now I can also use the M3 to play on it and I control it then from the synthesizer itself and from my normal working position I can clearly read the display as well.

I did have to move around some other stuff first in the studio though because on the spot where the UltraNova is now there used to be a Roland SH-32. Well that has moved to the place where my MB-6582 and AWRSynth32 are at. And the SammichSID that used to be there is now just left of my M3. You can see that in the top picture. So well call me crazy ;) But for me it is all in a very convenient spot now, but I nothing lasts forever. I'm still moving stuff around to get the ideal work-flow and I'll probably never stop doing that.

21 October 2010

Wilba MB-6582 (Part 8)

When I recently took the pictures of the SammichSID's I build together with the Wilba MB-6582 I realized there was still one more thing to do. There were still no knobs on the unit making it look like a work in progress even though it is finished and works fine. So I looked again for some knobs on the Internet. The company that makes them doesn't sell very small amounts and you only need 15 for the unit. I could not find another place to buy them so I decided to order 100 of them.

Today they arrived and I put them on immediately. And well I think they look stunning. Wilba really made a good choice with these knobs. Not the MB-6582 finally looks like a finished project :) I'm still considering though to change some or all of the SID chips for newer ones. I now have 8 of the vintage sounding 6581's in them. But I liked the sound of the newer 6582 or 8580 better to be honest. But I guess it won't be easy to find them. And I'm not even sure what I want. It both has something special so maybe I should put in 4 new ones and leave 4 old ones.

Back to the knobs. As you can see I still have a lot left and I would not know where I could use them elsewhere. So if you are building a Wilba MB-6582  kit or you are planning too, you could buy the 15 knobs from me. You could pay me with PayPal and I'd ship them to you. Just send me an E-mail if you are interested. I won't throw them away of course and it would be nice if I could help someone out this way. I guess I should put this information on the Midibox forum as well. OK enough about the knobs :)