12 October 2010

SammichSID (Part 5)

I finished up the first SammichSID today. It wan't much work any more just installing the panels. Here you can see a picture of the back panel with the paper still on it. If you click on the picture you can see a larger version and read the text that is engraved in it. You can also clearly see the C64 style power switch which I still think is a nice retro-touch. You can also notice that it has audio in next to the audio out socket. Both are stereo jacks by the way.

And here is a picture of the first finished SammichSID. I'm already a long way with the second one too by the way. So hopefully I can show you two very soon. In this picture you can see what I meant with the front panel and all the holes in it. It is made like a Honeycomb structure. Again you can also see the engraved text on the front panel. In the right top corner is also a logo. You can see it better in the picture below. Well enough about this time for action :)

I downloaded the latest Midibox SID firmware from the Midibox website. There is a special firmware version in the package you get for the SammichSID. After I uploaded it, it rebooted itself and gave the familiar bleeps that I knew already from the MB-6582. So far so good. Then I uploaded the presets with the new Java patch editor that is available. A very nice new tool by the way. Also that went well. Then it was time to hook up the audio and a midi keyboard to play on it. The first thing I noticed is how different the 8580 SIDs sound compared to the 6581 SIDs I have in my MB-6582. The newer 8520's sound much brighter and the filter seems to work better. But the 6581 seems to have more low end (bass) and sounds more vintage. So if you want to go into SID I think you should use both :) I can't say which I like more actually. Both is nice, but the presets that are made for the Midibox SID seem to fit the 8520's better. OK the only thing left to do is painting. I'm still not looking forward to that. I'm sure I'll screw it up. I'm good with electronics, but not with that kind of stuff.

11 October 2010

SammichSID (Part 4)

I worked some more on the SammichSID. Next thing was to put all the IC's in both PCB's. After that I connected both PCB's to each other and put power on it just to see if it worked. It seemed to work because there was a power up procedure and in the end the display said 'Ready' with a blinking cursor. That means that at least the PIC is running with MIOS installed on it. Next thing to do is assemble the casing. It is made of separate panels.
 Like I said before all the panels are covered with a paper layer. It is quite a tough job to get it of on some of the panels. Especially the front and side panels that have a lot of holes in it. The paper tears up every time so it is a job you need to be patient for. I left the paper just on the panels that need paint later on for the engraved text. In the picture you can see the bottom panel. There are some holes in there as well that are supposed to go where the power regulators are for better cooling.

The whole construction of the case is quite ingenious I must say. Everything is hold together with just the four long bolts and nuts that you see in the picture above. All other panels are stuck in between the top and lower panel. In the picture on the left you can see the base PCB attached to the lower panel. Then you have to put the 20 mm spacers on all the screws from the bottom. On top of there the front panel PCB is mounted as you can see in the picture below.
When I got this far I decided that I wanted to know if the SID's worked, because when everything is put together you can't reach inside anymore. So I downloaded a test program from the Midibox website. You can upload it with the MIOS software over Midi. When it was loaded it immidiately produces a 1 Khz tone on both the left and right SID chip. So I knew they were working alright. So it all looks good. Time to close it all up, But not today. Time for a rest :)

Synth.nl with Artico played on A Ultima Fronteira Podcast

My track 'Artico' from the OceanoGraphy was plated again by Roberto Vales on his radio show A Ultima Fronteira. You can still download it and listen to this podcast on this URL:

http://aultimafronteiraradio.podomatic.com/

Do keep in mind that the radio show is in Spanish. Last week I also started sending out promo CD's to radio show from the new 'Refuge en Verre' album. So I hope that will get some airplay as well. If it does I'll let you know of course :)

SammichSID (Part 3)

Today I started on mounting the leds on the front panel PCB. To get them in the right length you first have to temporary mount the front panel on the PCB. But first you have to put all the leds in the PCB because they will go in between. To get the alignment of the front panel right you also have to put the buttons on the switches. Then you can turn everything upside down and stick the leds one by one through the holes in the front panel and then solder the leads from below.
 And this is what it looks like when you are done. There is still a layer of paper on the front panel both to protect it and you also have to put paint in the engraved letters and logo on the front panel. So I will leave this paper on until the unit is completely done. After this you can disassemble the front panel again and continue work on the PCB. In the picture on the right you can see how the leds look when you are done. with the front panel still one.
And here is a picture with the front panel removed. As you can see all the leds are in the correct height now. You could never to this as well without using the trick with the front panel as described above. Next thing is doing some power tests without all the IC's installed. To do this you connect a stabilized external 12V adapter. And then measure the power with a multimeter on certain points of the base PCB. There are two voltages to check 5 Volts and 9 Volts.
Then you need to put the front panel PCB on top and check the voltages there as well. You can also regulate the brightness and contrast of the LCD in this stage using the small potmeters on the side of the base PCB. And there are also some jumpers you need to install depending on what type of display you use and also depending on which SID chips you are going to use. This SammichSID will use 6582 SID's and then you also need to install the right capacitors next to the SID's. They are on sockets so that you can exchange them if you need to. So far things look OK. All the power tests were OK. So I guess I'm ready to go on.

10 October 2010

Refuge en Verre Released !!

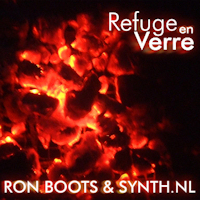
Yesterday a new album called 'Refuge en Verre' was released by Synth.nl & Ron Boots. It is our first album together and there is a nice story to it. We first met at a Synthesizer Meeting organized by the Dutch 'Synth Forum' in 2006. There we started talking about synthesizers and synthesizer music and found out that we shared the same fascinations. As a result Michel signed up as Synth.nl in 2007 with Groove Unlimited. We worked a lot in the studio together after that remixing and mastering. Since then we have become very good friends and we visit each other on regular basis. Also our wives, kids and even the dogs like each other. In 2010 our wives decided to rent a house together in the Belgian Ardennes for a weekend. We both brought a synthesizer and a laptop and tried to make music together for the first time and that went very well actually. We recorded quite some tracks there. After the weekend we decided that we should release this music on CD. So we started on finishing the music together when we got back in our own studios. The result is this album called 'Refuge en Verre', which was the name of the house we rented. We got the inspiration for the music we played from the beautiful nature in the Belgian Ardennes and the nice time we had with our families over there. Most of the tracks were played live as improvisations in the temporary studio that we created in the rented house. This album was released by Groove Unlimited at the E-live festival in Oirschot (NL) on the 9th of October 2010. The CD holds 8 tracks on it and is over 70 minutes long. You can find more information about the album and also where to buy it on this URL: http://www.synth.nl/Refuge

Contemple du ciel on Syndae #105

Stefan Schulz from the German podcast Syndae played a track from the new 'Refuge en Verre' album that I made with Ron Boots. The track is called 'Contemple du ciel' and you cannot hear this track on the samples on my website or the Groove website. So I think it is worth listening to it on the podcast. Stefan already made his 105th radio show and plays some very nice music on his shows. You can find the podcast on this URL:
htttp://www.syndae.de

08 October 2010

SammichSID (Part 2)

I worked some more on the SammichSID. Here is a picture of the power regulators. There are actually two heat sink that are mounted on top of each other and on top of that the power regulators are mounted. Between every layer you have to put non-conductive heatsink pasta. That is really sticky stuff that you don't want on your clothes and on the rest of the PCB. So you are advised in the documentation to practice the whole construction first without the pasta. Well I hope I did this right.
Then you have to solder the interconnections between the two PCB's. They are actually not soldered together directly but there are connectors on both ends. But you are advised to put them in place and mount the PCB together with the supplied material. Make sure they align very well and then solder the connectors. When that is done you can disassemble the two PCB's again so that you can start working on mounting and soldering the components on the front panel PCB.
Here is a picture of the finished front panel PCB. There are some components that have some special instructions as well in the documentation because they are right above the heat sinks on the base PCB. You have to solder them from above so that you can cut the leads on the bottom of the PCB as short as possible. In this way you can avoid them touching and short circuiting anything. It is all described very well in the documentation, but you DO need to read it ;) The next thing left to do now is solder all the leds. I'll probably start working on that next week.

06 October 2010

SammichSID (Part 1)

Last week I started another new DIY project. It is a SammichSID synthesizer. Actually I will be building two of them one for my Friend Hans and one for myself. It is a bit like the MB-6582 I build before but a bit simpler. It has only 2 SID chips on board. But it will have that same fat Commodore 64 sound that brings you back to the 80's right away. Here is a picture of the whole kit that comes including the enclosure and display. I ordered the kits a long time ago, but it took a while before I got them. But now I also finally have the time to work on them.

In the picture on the right you can see the content of the kit. As you can see there are two PCB's. Like on the MB-6582 there is a base PCB that holds the SID chips and the PIC that controls them and there is another PCB that will hold the front panel components in place. There is a hole in the PCB were you can mount the display in later on. In the left top corner of the picture you can see the enclosure. It is made of loose panels. Normally the case is black with red leds and a red display, but I have a white case with a blue and white display and I got some neat blue leds from Wilba to put in. I'm sure that will look stunning :)

Wilba has the documentation as a PDF on his website. I think your should read it before you order the kit. Then you can see if you have the necessary skills to complete it. This is not a beginners kit I think. OK now to the construction. First thing to do is solder components on the base PCB. in the picture on the left you can see all the resistors, small capacitors, and IC sockets in place. The reason you do that first if because then you can still lay the PCB flat on its back so that it is steady when you solder on that side.

And then you can start on the larger components. Especially the components on the back panel are big. On the top left are the two midi connectors then the audio connectors (stereo jacks)  the external power supply connector and on the top right is the C64 style switch. That switch is a nice touch in my opinion that keeps it in the spirit of the good old C64. Do note in the lower right corner the metalized area on the PCB. here the power regulators will be mounted. And that is quite a tricky part actually. I will explain that in the next part. Enough for today ;)

Remote Control

Here is the kit for the remote control that I will use to control the 8 channel relay card that I build yesterday. Today I also picked up the optional RX433 receiver module what I was still missing. Luckily my local electronics shop sells these Velleman kits, so I could just drive by and didn't have to order online and wait a long time for it. Today I started building this remote control kit and I also completed it today. It also took me about an hour to build this one.

Here is an overview of all the components in the kit. Not that much actually and the PCB is also quite small. Again the manual is quite clear on everything. The are just two tricky things in the construction. One is that you have to make a 1 turn coil that has to be 5mm high. I'm not sure how critical this is actually, because that is quite difficult to do accurate on the millimeter. The other thing is that have to bend a led in a certain way. Both are described quite well, but you need to be a bit handy with pliers.

Here is a picture of the inside of the finished PCB. What you see is the backside of the PCB. There are the contacts that will be in touch with the keys later on. You can also see the battery compartment on the bottom. It runs on 3 AAA batteries. Fiddling everything in the case is not complicated, but you need some patience since everything has to be perfectly aligned. And on the PCB are also some component that you need to bend away for them to fit inside.

And here is a picture of the finished remote. It is not really good looking, but as long as it does the job right? :) The remote is transmitting radio waves by the way on 433 Mhz it is not a Infrared remote. That is very nice because then you don't have to point at the device you want to control. I have tested the remote with batteries and at least the led is showing activity. I still need to mound the receiver module now on the relay card and attach a power supply before I can test everything. I'll do that soon.

Remote Relay Card


 Yesterday I made another Velleman kit. It is an Eight-Channel Remote Relay Card. It has 8 relays that you can control with an optional remote control. Both the receiver and remote control are not in this kit. So beware if you want to but it. Those are optional extras. I will use this relay card to switch the power supplies of the modulars that I'm building, so that I can easily switch stuff on and of without having to reach in difficult to reach spots to switch them on and off.

In the picture on the right you can see all the components that are in the kit. It looks like  a lot, but it actually isn't that much. The components are just quite big actually. Especially the relays are quite big. The documentation is quite clear again and from the documentation I learned that you can also switch this kit with RS-232 in stead of the remote control. Then you have a PC application that you can use to switch. It took me about an hour to build this kit. So it is not much work.
And here is the finished result. The only thing you have to think about is that the green terminal connectors you see below have to be interconnected before you solder them in. Of course I didn't do that ;) And I had to de-solder the first four again since the fifth wouldn't fit. So you are warned :) It is written in the documentation of course, but I didn't read that part to well. Further more this kit needs a power supply itself as well. So I'm going to see now what I need. But next up is constructing the remote control.

05 October 2010

PC Datalogger

Today I didn't feel like doing a lot with music. I have been quite busy recently finishing the album with Ron Boots and last week I was very busy with sending out some previews to radio stations and putting preview online on my website. So today I decided to heat up the soldering iron again. I still had a Velleman kit lying around that I bought when I was building the PC scope and PC function generator. This is also a measuring device. It has 4 inputs that act like a Volt meter, but it can also store the values it measures over time. It is called a Datalogger.

It seemed like a nice kit to work on today, because the Velleman kits are so well documented and even the parts are supplied in the right order, so you don't have to think too much ;) Well here you see all the stuff that came in the kit. You can see all the components but also the enclosure that is also in the kit. There is no power supply since the PCB has a USB connection and it gets its power from the USB port of the PC. Quite convenient actually.

It took me about an hour to complete the PCB. Not very complicated this one. You can see the result in the picture on the left. The only thing strange is the leds sticking out. They could have made that a little nicer I think with some led holders on the enclosure and wires to the PCB. But ah well this probably saved some money on the kit. After finishing the PCB it is mounted on the bottom part of the enclosure with some supplied screws.


And then the last thing to do is put on the top of the enclosure and screw that to the bottom. You can see that the connectors still stick out. Then there is a CD supplied with the software that goes with it. I haven't installed it yet, but I'll try it out soon. If you are interested in this kit or want to see what else Velleman is selling go visit their website at http://www.velleman.be. I'm sure you can find something nice that you always wanted to build yourself :)

04 October 2010

Refuge en Verre Sound Clips Online


I just uploaded more sound clips for you to listen to from the upcoming 'Refuge en Verre' album from Ron Boots & Synth.nl that will be released next Saturday. The album holds 8 track in total and they are a bit longer than my own track usually are. So we decided to take 5 minute excerpts from 5 tracks. That is 25 minutes you can listen to from a total of over 70 minutes of the CD. So I guess that should give you a good idea what the CD is like, but then you will still have 3 surprise tracks left when you buy the album. You can find the sound clips and more information about the CD on this URL: http://www.synth.nl/Refuge

03 October 2010

Close Encounter Sound Clip Online

As I wrote before there will be a new Nattefrost album released by Bjorn Jeppesen on the 9th of October at the E-live festival in Oirschot (NL). Bjorn is just like me signed under the record label Groove Unlimited. And that is how we got in touch. We have met on several occasions, mostly electronic music related events. We have become good friends since then and are in regular contact over the Internet. In 2010 I joined Bjorn on a trip to Sweden where he played on the Norberg festival. During this trip we also spend some time in his studio and played some music together. There also a track called 'Close Encounter' was born that now features on Bjorn's new CD. This is the first Nattefrost and Synth.nl collaboration and I'm sure more will follow in the future. I have an excerpt of the track now online on my website here you can listen to it and also read more about the album and our track and you can find where you can buy it. More information on this URL: http://www.synth.nl/Nattefrost

Refuge en Verre Radio Premiere on Dreamscape #115

Yesterday Ron Boots played the first track from out upcoming 'Refuge en Verre' album on his radio show Dreamscape Radio #115. The whole track is actually 12:16 long, but Ron played a large part of it. You can find the radio show on this URL: http://dreamscape.groove.nl/. Please mind that you need to allow pop-ups to be able to listen to it. It will only be only for a week so be quick. You can read more about the album on my website http://www.synth.nl/Refuge. There are still no sound clips online. I'll do that the coming days so keep following this blog as I will announce that here of course. Only 6 days to go until the release. I'm getting excited here :)

02 October 2010

Synth.nl with stall at E-live Festival in Oirschot (NL)

On the 9th of October there will be another E-live festival in Oirschot in The Netherlands. It is organized by Groove Unlimited and they have quite a nice line up. I will have two releases on CD that day that you can pick up first hand from my stall over there. The new CD 'Refuge en Verre' with Ron Boots & Synth.nl will be there and also one track of Nattefrost and Synth.nl will be on his new CD 'Scarlet Moon / Dying Sun'. Nattefrost will also play live. Check the website of the E-live festival on this URL for more information: http://e-live.groove.nl

30 September 2010

SchallPlatte XII Released with Mercury on it!

Yesterday I received the newsletter from Schallwende E.V. the German Electronic Music club. It looks like the new SchallPlatte XII CD is finally released! My track 'Mercury' is on that CD and you have been able to listen to it already a couple of times on the radio. I'm very happy to be on the CD since a jury selected 11 tracks from 35 entries. You can read more about the CD, what the track is about and listen to a preview of my track on my website at this URL: http://www.synth.nl/SchallPlatteXII. If you are interested in this CD you should become a member of the music club I guess since they only send this CD to all their members. More information on Schallwende E.V. is at this URL: http://www.schallwen.de. Enjoy !!

Lift Fan Video

Dorothy made this very nice video to help me to promote my music. The music in the background is the track 'Lift' from my first album 'AeroDynamics'. Thanks Dorothy!

Electronic Circus 2010 was great!

Last weekend I visited the Electronic Circus in Bielefeld. I had a really great time there. Here you see a picture of me together with Stefan Erbe (on the left) who did the moderation already for the third time and Hans Herman Hess (in the middle) who is one of the organizers. The concerts were very nice. I especially liked the Morpheusz concert where Ron Boots, Eric and Harold van der Heijden en Frank Dorittke played. But more important the atmosphere was so great. As you could see everybody is in a good mood and drinking a beer along too.
The great thing was also that there were a lot of stands from a lot of musicians. I had a stall there as well. The whole idea of course is to sell some CD's there but I heard a lot that people already had my CD's and that is also nice to hear of course :) I did sell some, but more important I met a lot of people that I know from MySpace and Facebook like Stefan Schällmann in the picture here. It is always nicer to talk to people in person of course. It was also good to see that there were a lot more visitors than last year. A good thing for the organization of course. I would like to say THANK YOU to the organizers of the Electronic Circus for a great event. I'll be there next year for sure. Want to see what you missed? Go visit the website: http://www.electronic-circus.net/.

29 September 2010

Refuge en Verre Mastering is Done !!

I have been working a lot the last two weeks together with Ron Boots on the finishing of our first collaboration album 'Refuge en Verre'. And today we finished the mastering, so the CD is completely done now. After we listened to the final master one more time, we actually drove to the CD factory together to deliver it. So now we are sure it is there in time. It was great to see also how the CD's are pressed there. Very impressive. It is only 10 days until the E-live festival, but we are sure that the CD will be ready in time now. So come and pick up the first copy in Oirschot (NL) on the 9th of October!! I hope to see you there! Now I finally have some time to breath again :)

24 September 2010

Serious Metal Job on Sony DPS Series

Recently I bought this very nice set of Sony DPS Effect Processors. I found them all in one batch. The Sony DPS-D7 is a very nice delay, the DPS-R7 a very good reverb, the DPS-M7 is a modulator and the DPS-F7 is a Filter unit that also does EQ, compression and limiting. If you see them in this picture they look quite OK, but they didn't arrive in this state unfortunately. I think the courier that transported them ran over them with a truck or dropped them from a flat or something.

Well this was the state they arrived in. You can probably imagine how I felt when I took them out of the box. The stuff was packed in bubble plastic, so normally you would suspect it should withstand some handling. But this must have been hit with a tremendous amount of force by a blunt object. The front panels are made of aluminum so I can imagine that they bend easily, but behind the rack ears is some steel reinforcement. And they were bent as well. The first thing I did is take them off. I had to apply a lot of force to bend them to 90 degrees again.

After that I completely took them apart so that I could remove the front panels. Then with a soft hammer I worked on the aluminum to bend it straight again. That worked out quite OK. The only thing you see now it that the paint is gone is some places. But in this pictures up close with flash it looks way worse that you would normally see. But I'm going to try to use some black paint to fill up the spots. But after reassembling and checking everything on the inside was in one piece I focused first on another thing. Testing! I was very curious if everything still worked. And you won't believe it no problems at all :) Sony build these things like a tank I guess. After this I contacted the E-bay seller and showed him the pictures. He was not happy, well neither am I. He is trying to get the damage paid by the courier. We'll see what happens. Thanks mr. Courier. Oh Parcel Force is the name ;) Don't use them!