01 October 2013

Biz2Be 3D Logo and Under Construction Page

For a friend who is starting a new company I'm currently doing some 3D work. First of all another design company made a new logo for him in 2D. I got the vector file from him and we made some adjustments to the bottom text and then I made this 3D logo for him. I think it turned out quite nice. Then he asked me to make an 'under construction' page for him to put the logo online while he is working on his website. I though let's make something nice. I rigged the little character to take this position and added some nice contruction elements to make a complete 3D scene out of it. You can view the full version by clicking on the picture or visiting his website http://www.biz2be.nl (as long as it is not done yet). I hope you like it. And do contact me if you have a job like this :)

17 September 2013

Blender on the Render Farm

Even though I'm a very happy Cinema 4D user, the first thing I bumped into when I tried to find customers for the Render Farm is that not everyone is using Cinema 4D of course. There are many 3D design applications out there. One of them is even completely free since it is open source and it is called Blender. You can download it and install it and start working with it right away. I was actually amazed how powerful it is. Anyway: last week I installed Blender on the Render Farm and I did some successful testing with it. So if you use Blender (or C4D) and you have a large animation to render give me a shout and maybe we can work something out. I'm sure I can render it much faster on the render farm than you can do yourself on your own PC. More information on Blender here: http://www.blender.org/

16 September 2013

SchallPlatte 15 Released with Synth.nl track Underground

Recently the German Electronic Music club Schallwende released another sampler CD. It is already the 15th edition of the SchallPlatte series. This CD is only distributed to the members of the club and is not for sale. A jury always selects the tracks from a large amount of submissions. This year I decided to send in a track and I'm proud to see that it was selected again. The theme for the CD this year was 'World Cities'. I made a track about my favorite city London in the UK and used some samples that I recorded myself from the London Underground. The track is called 'Underground' as well for this reason. You can listen to the track on my website on this URL http://www.synth.nl/SchallPlatte15. I hope you like it. It will be my only solo release this year I'm afraid. Hopefully I'll have some more time in the future for my solo work again. Well. Enough for now. Enjoy! :)

05 September 2013

Installing C4D R15 on Render Farm

Yesterday I got a nice package in the mail. The new version of Maxon Cinema 4D R15. As you all know I have been busy with 3D animations for a while. This version really looks great again. They even promise render speed increases of up to 300%!! I can't wait for that. Rendering in high quality always takes to long. For that reason I have been building a render farm over the last years that finally is taking shape. I hope to make a commercial service out of this somewhere this year as well. I'm already talking to some potential customers. I will tell you more about the render farm very soon, but if you are interested in a lot of CPU's then don't hesitate to contact me already, since the render farm is already operational. OK back to installing this new version on a lot of servers.

31 August 2013

Velleman K8200 3D Printer (Part 5)

Another very critical and not so easy part of building the K8200 3D printer is assembling the hot end. This is where is plastic eventually will be heated to 190 degrees C with PLA and even higher with ABS. To keep the temperature steady a tiny NTC has to be inserted in a very small whole in the heater. The wires are about as thin as a hair and you have to solder them to the thicker wire, put heat resistant tube around it and make sure none of the leads touch each other and don't touch the copper either.

If you make a mistake here or don't insert the NTC resistor properly in the whole your temperatures will be off and your prints will fail. You need a lot of patience here :) On the right is a picture of the whole hot end. It is actually up side down. Eventually the plastic flow from the little hole on top of the copper nozzle. This is the print head and it will be about 0,25 mm from the print bed. Another remark is in the manual that you need to tighten all of this very good to prevent leakage that will be unrepairable and will cost you a new hot end. So again. Patience and check and double check everything.

The it is time to install the control board and solder all the wires. Not a very exiting job but again you need patience and some soldering skills. The manual is quite extensive about which wire goes where and shows a lot of pictures. So if you follow along carefully you can't go wrong there. When you are finished you wrap everything up neatly with some tie raps and you can do some sanity checks with your multimeter to see if there is no short circuits anywhere.

And then you are done building, but not finished by far. The first step is calibrating the stepper motor voltages. You need a multimeter and a very small screw driver for this and again patience :) Then you test the switches with the multimeter and measure the NTC's. And then the famous smoke test. Hook up the power, watch the leds and see if nothing smokes. When that is done it is time for some actual testing from the software and seeing if all the motors run and if the calibration works. So far so good. I'm happy to say that everything was working for me the first time. But the story isn't over yet :) The hardest part turned out still to come. More on that soon.


27 August 2013

Velleman K8200 3D Printer (Part 4)

Next part to build was the extruder. This is the mechanical part that feeds the filament (plastic material) in to the extruder. It holds one motor and some gears. The tricky part here is to put a spring in that has quite some tension to it. And this also holds the last motor. It is very essential that everything runs smoothly again. The manual also talks about some bolts that need to be 'tight' and some that cannot me 'too tight'.

All very relative right. I thought as longs as it runs it must be OK. Then you have to attach it to the frame. I found out that this is not easy. You have to put some rings in between and they kept falling our every time I tried to screw it on. I think I did this 10 times over. But well. It is on now. This actually concludes most of the mechanical moving parts. Everything still runs fine so I'm quite happy so far.

Then you have to assemble the heated print bed. There are two tricky parts here. First of all you have to solder on a NTC on the backside. Not easy since it is a SMD component and it is very small. Luckily I did this before, but you need some skills and a good soldering iron for this. It is essential that you solder it as flat as possible or you will get into trouble later. Also the screws are actually to large. They stick out of the bed. Try to avoid that since the print head will only be 0.25 from the bed and the screws can be higher. You don't want to hit them since the software doesn't know the screws are there.

Then you finally get to install the mysterious part that you build the first. And suddenly you understand its purpose. It only holds the spool of filament later on. So the detailed description given about the measurements here make no sense at all since all the spools I've see so way are way smaller that this. But a well.. It fits :) I did have one spool laying around and of course it fitted easily. OK so far for the mechanical part. After this it will be electronics and lots of wiring.


25 August 2013

Cloudpage Logo and Mailing List

At the moment I'm working together with my good friend Ringo on a new software product that we plan to release as a private cloud solution for small and medium sized businesses. We think it can improve efficiency for these companies in handling their information and document/files and make working together a lot easier. It will be a new way to work we think. More information will come soon. I Can't tell you more now. It is still early in the process and we still have a lot of work to do. Ringo works hard on the software and my job is the commercial part and there I already made a little start. We thought of the name Cloudpage for the product and Robin from Frontline Studios made this very nice logo for us.

We also registered the domain names cloudpage.com, .eu, .nl etc and I also started building a little website last week in Joomla for it. The most important thing on there right now is our contact information so we can keep you posted on the progress. There is a mailing list where you can subscribe and also a link to the Twitter, Linked-In, Google Plus and Facebook pages that we made for this product. So do subscribe to the mailinglist and connect on your preferred social media site to keep updated. You can always send me an E-mail as well if you want to know a little more already. You can find the website on http://www.cloudpage.com. Thanks for your interest!

Velleman K8200 3D Printer (Part 3)

I didn't have much time lately to continue this report, but now I did so here it continues. Next part in building the printer was constructing the frame. It is made of clever aluminum struts held together by 90 degree angled clamps. I never saw this stuff before, but it is really cool you can build anything with this I guess. Tricky part is you really need to read the manual here since you have to insert some square nuts in there that you will need later.

After that you insert the X/Y carriage that was constructed before. Aligning is a careful job as well. It has to be positioned very well. The cool thing is after this you are able to move it around and get a sense of what it will be like when it is printing. I was quite happy that everything seemed to move very smoothly so I could go on to the next part. Down side is now that it is getting quite a large piece to work on so I had to continue my work on the floor.

Then you start building your way up. These two assemblies on the left and right will eventually move the print extruder assembly up and down. So this is for the Z movement. On the left is another motor with a long piece of threaded material attached the drives an embedded bolt. On top you have to apply quite some force to screw on a lock tight bolt. It is quite difficult to hold it all. You have to be especially careful not the damage the thread since it will make smooth movement problematic later on.

And the last part is to install another piece of aluminum strut on top to hold everything together. I didn't follow the manual here on purpose. The bar is supposed to go lower with a bracket on top, but I thought it didn't look as nice and I preferred to mount it like this. I could not think of any problem this would create since the whole construction was still rock solid. And it really necessary I could always change this later on. So far so good. Everything still running smoothly also by turning the motor for the Z movement. It is really starting to look like a real machine already :)

11 August 2013

Velleman K8200 3D Printer (Part 2)

And here is the correct tool. Life if so easy when you have the right equipment. With this tool snapping the O-rings in place was a matter of seconds work. So do your self a favor and get one of these. Velleman is quite clear by the way in the manual as well about the tools you need, so go check this before you start your build and get frustrated. OK enough about the tools lets continue with the build.

After the this you need to construct the other carriage and these two go together with some rods. It is very important that you get this very straight for a smooth movement later on. So you are advised to tighten all the screws while moving the carriage so that it aligns during screwing. Don't apply too much force since it will twist the part then. I found also that adding a little teflon spray helped to make thing evens more smooth.

After this you have to install the first motor. In total there will be 4 motors in the whole printer. One for the X, Y and Z movement and one for the extruder later on. The most difficult part in this step is cutting the timing belt. You have to count an exact number of tooth and not more one or less. If you screw up here you can order a spare part :) I think I recounted about 5 times  before I finally cut it and still wasn't sure :)

Here is the complete X/Y carriage including the motor and the belt. Eventually the heated print bed will be attached on top of this whole construction. Well so far I am happy with the result. I'm not that skillful in mechanics but it all runs very smoothly. Before I called it a day I did read the rest of the manual to estimate how far I could get the next day. But I was pretty sure it was going to take at least 3 days to build this thing. So far for day 1. To be continued..

Velleman K8200 3D Printer (Part 1)

Another thing that has been on my mind for a long time was building my own 3D printer. I had been looking on the internet for several projects, but none of them were very clear. I found some kits, but they were a bit expensive, then just a week before my holiday I visited my local electronics store to pick something up and there was this 3D printer kit from Velleman on the counter. Complete and ready to take and for a price I thought was really interesting so I couldn't resist it and took it home including some PLA print material. The kit is called the K8200 and I started building it right away. I took picture along the way so I thought it would be nice to share this experience with you as well on my blog.

Here is the content of the box. A lot of small bags with parts, some metal parts and some electronics. I was expecting a bit manual, but I couldn't find it at first, but when I read the documentation that came along they pointed to a website. On there is the real build manual and it is rather extensive. A lot of detailed pictures. For the first step I made the mistake to print the pdf, but that were way too many pages, so I continued the build next to my PC to read a long on the screen.

The first part to build is rather simple. It is just a rod with some nuts and rings on it. At first I didn't understand what it was supposed to do, but later on in the build project I found out that this is the spool holder. The plastic material is delivered on spools as you can see in the very first picture and this thing sticks on top of the printer later to feed the material into the printer and make the spool rol turn on its own axis. Nothing fancy but still an important piece :)

The next part to build is the carriage that will hold the print bed later on. I immediately ran into trouble there. On top in the picture you see some ball bearings and below that some O-rings. You have to put these rings around the ball bearings and slide them into the black plastic parts. You need a special tool for these o-rings and I didn't have it. So I tried to get them on using other tools, but that is really impossible. Then my wife was smart enough to see this and ask me what I was doing. I said I didn't have the right tool and that it was Friday evening and the shops were closed. Luckily my wife is better into shopping as I am and told me the hardware store was open all evening :) Oh. I just spend 1 hour for nothing. I short trip to the hardware store and 15 euros further I had the right tool. To be continued in part 2.....

10 August 2013

Oculus Rift: My first steps into Virtual Reality

As you all know by now I'm into 3D stuff as well next to my music. One of the things that always fascinated me was Virtual Reality. Long time ago I did try one of those VR goggles, but was not impressed by the quality and also a lot of lag on the head movement made me dizzy. Besides that they were ridiculously expensive. Then I read about a project on KickStarter that would solve all this. It look so promising that I decided to join the crowd funding of this project. And last week it arrived, so I couldn't wait to have a go.

What you get is this nice box. It is not the final product yet, but a developers version. It is intended for people to develop games for the Oculus Rift. And yes you guessed right that is the name of this product. In the box are some different lenses so that you can adjust it to your eyes depending on whether you wear glasses or not. Then there are the Goggles and a control box. Installing is simple. You put a HDMI cable from you PC's video card in the box and a USB connection from the box in your PC. Then you install the software and you are good to go. At least. You still have to tell your video card that you have an extra monitor.

Then you start the calibration software. You have to close one eye at a time. Adjust some green lines and then you can test your settings. You are put in a room and you can look around. I was already SO impressed by this. But then I downloaded some demos from the Internet and it got better and better. The head tracking is so superb that it feels SO real. Amazing. And usually I get a head ache instantly from 3D glasses on these new 3D TV's, but not here. It is way better and you can look up, down, behind you. In the end I found some games and I'm totally hooked now :) I can really recommend this. Even though the resolution isn't even that high. 1280x800 divided over your two eyes (so 640x800) each, minus some adjustment I guess. So yes you can see pixels, but once you are moving around or looking around you don't see them any more. Your brain really let's you think you are in another (virtual) reality. More information and pre-orders from here: http://www.oculusvr.com/. I'm sure this will be the future of gaming! Highly recommended.

14 July 2013

New Synth.nl website with HTML5 Media player

I just launched a new version of the Synth.nl website. The design is still the same, but under the hood it is now based on Joomla 2.5 where the old website was based on Joomla 1.5. I did make some adjustments to the design as well. It should load a bit faster now. I did rearrange some content: The interviews, reviews, pictures and videos are now accessible directly from the main menu. I think they are easier to find this way. But there is also some new stuff.

First of all I incorporated a new mailing list. It is now easy to subscribe and unsubscribe directly on the website from the 'newsletter menu' under the main menu. This is the first newsletter from the new plugin. I did delete all the old logins since it was full with spam accounts. Please make a new account for yourself if you want. It is now a bit harder for spammers since I use a Captcha verification.

The biggest change is the new HTML5 media player on the website. I used to have a flash player on the old website and got some complaints in the past because not all browsers support flash anymore. Especially on Ipads. Now it should work in all browsers.

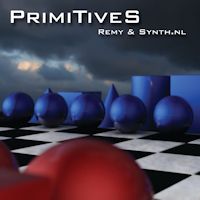
I also uploaded new sound excerpts of 5 PrimiTiveS tracks. They are all 5 minutes long. So you get a good 25 minute impression of this over 70 minutes long album that I made together with Remy. I guess that should be enough for you to decide to buy it and support both me and Groove Unlimited my record label.

You can find the new player and PrimiTiveS excerpts on this link http://www.synth.nl/PrimiTiveS

Please help me to test the new website for errors. If you find anything please send me an E-mail on michel@synth.nl

Thank you very much for all your continued support!

09 July 2013

Virtiso Hosting Platform and my Work

A couple of you have heard that I started a new company and asked my what I was doing. I thought it would be nice to explain that a bit in a blog post here. First of all my new company is called Virtiso BV and is based in The Netherlands. I'm in the IT business as long as my memory goes back and in the ISP business since 1996. I have seen it all and done it all so I think I know what I'm talking about. I have also been an entrepreneur for the last 18 years. My main business is helping Small and Medium Businesses (SMB) with their IT needs. Whether it is advice or helping them to build a website, webshop, a groupware solution for E-mail, Calendars and Contacts or other Private Cloud Based solutions. To facilitate all this I build a small VMWare based hosting platform. Here you can see 8 Sun X4200 servers that have ESXi 5.1 running on them. On those physical servers I can run many virtual servers. And that is where my business is going now. Renting out both managed and unmanaged virtual servers.

For the geeks I also included a picture of the backside of the rack. The machines are all on rails by the way so I can roll them in and out easily for maintenance. These servers are located in the datacenter BIT-2A of the company BIT BV in Ede. This is the company I started together with my partner Henk in 1996. We are both still share holder, but no longer active in the operation. BIT has grown onto larger customers with high demands. With my own company I'm focussing on the market below. Small entrepreneurs, freelancers and companies with smaller IT needs or companies that just need decent webhosting without 99,99% SLA needs. Even so I tried to setup my platform as redundant as funds allow. There are two netscreen firewalls, double internet feeds, the VMWare platform is fully redundant and I also rent storage on a very redundant NetAPP cluster from BIT.

Here is the management platform. Here is also some storage that I use for backups only and the servers to manage the Sun cluster. The network stuff in in the picture on the lower right. Here you can see the switches and firewalls. BIT provides me also with redundant powerfeeds with both UPS'es and Diesel generators on both the A and B feed. So I guess this platform is not too bad :) Do let me know if you are reading this and think that I can help you out with something. I'm specialised in VMWare, Microsoft and Ubuntu Linux but I'm also very experienced with Kerio Connect, Control en Operator. Very cool products. Do look them up if you never hear of them on http://www.kerio.com. These product I also rent out as a managed service.

Next to this technical stuff I also design websites, build webshops and develop software. For the graphical side you probably have seen my 3D animations as well. That is another hobby I run next to my music stuff. For this 3D stuff you need a lot of computer power as well. Even rendering out a small animation takes a long time. For this I'm also building a platform in BIT's datacenter. This is a seperate platform from the hosting platform. I will show you this in the near future as well. I hope to find some customers as well for this in the graphical business. So I would say if you know someone who is looking for rendering capacity do let me know as well. And if you are looking for a datacenter in Europe/The Netherlands do check BIT out :) http://www.bit.nl. OK I hope it is a bit clearer what I do now. The website for my new company is hardly finished btw so I'll post that later when I think it is suitable :) If you have questions do ask of course :) Just send me an E-mail.

08 July 2013

New E-live 2013 website online

Twice a year Ron Boots from Groove Unlimited (my record label) asks me to make a new design for his festival. On the 19th of October the yearly E-live festival will take place again in Oirschot in The Netherlands a little town near Eindhoven. This time I parted with the purple color we had the last years and switched to blue. I made a new headline graphic with the artists that are playing this year. I hope you like it. Do have a look at the nice line-up if you like electronic music and buy your tickets in time. You can find the website on http://www.e-live.nl. Ofcourse I will be present as well during the festival possibly with a stall to sell CDs but I'm not sure about that yet.

01 July 2013

Bellerob - Paper Planes Fan Video

Bellerob did it again! This time he made a very nice video with the track 'Paper Planes' from the PrimiTiveS album by Remy and Synth.nl Enjoy !

26 June 2013

Synth.nl Apollo Documentary by Thomas de Rijk

In 2010 I was contacted by Thomas de Rijk who was studying at that time at the Willem de Kooning Film Academy in Rotterdam. He asked if I wanted to cooperate in a documentary for his school project. And of course I agreed. He made this very cool documentary about my burn-out and how I got into producing my own music. I think he did a great job! The documentary is in the Dutch language, but it has English subtitles. I hope you enjoy it. I has some nice NASA HD footage (courtesy NASA) and also some nice shot from my Apollo Studio. It took a while before it ended up online, but here it is:) The music you hear is coming from my Apollo album. I hope you enjoy it. Thanks a lot Thomas!

15 June 2013

Bellorob Apollo 9 Fan Video

Bellerob made this very cool video of my 'Apollo9' track from the 'Apollo' album. Enjoy :)

10 May 2013

Interview with Bruce Gall on AR FM about PrimiTiveS

Bruce Gall from Sunday Synth at the UK radio station AR FM did another two hour special. This time on the PrimiTiveS album I did together with Remy Stroomer. Bruce played all 9 tracks from the album and in between he did an extensive interview with me. It was broadcasted on the airwaves and also on the web stream. I cut out most of the commercials, so it is a bit lot shorter now. You can listen to most of the album though. I hope you will enjoy it and buy the album of course when you like it. You can find a copy of the interview here: http://www.synth.nl/interviews/AR%20FM%20Interview%20(07-04-13).mp3

26 April 2013

PrimiTiveS available as MP3 and FLAC

I have good news. PrimiTiveS is now also available from the download shop of Groove Unlimited. You can chose between two formats. Either 256 Kbit/s MP3 or Full Quality FLAC. Both files include the complete artwork. You can pay with PayPal or Ideal (from The Netherlands) and after your payment you get an immediate download link in your E-mail. All very easy and it saves you shipping costs if you are from outside Europe. You can find the download links on these URL's:

MP3 -> https://shop.groove.nl/gr-198-mp3
FLAC -> https://shop.groove.nl/gr-198-flac

More information on the album here: http://www.synth.nl/PrimiTiveS

Two more PrimiTiveS tracks on Elektroland Radio

Here is another chance to listen to two more tracks from the PrimiTiveS album by Remy and Synth.nl. They were played by Bjorn Jepessen on his radio show Elektroland. This radio show is also available as a podcast online, so you can download the show and listen to it whenever it is convenient for you.

You can find Bjorn's Elektroland show on this URL: http://www.nattefrost.dk/elektroland/playlist.htm