I have some good news. I told you before I'm working on a new solo album called PalaeonTology, but there is another album coming very soon. It will be called TimeTravel and it is kind of different. In the past years I released a lot of single tracks on different samplers. Some where for sale like the Dutch Masters and Analogy 3 album by Groove Unlimited. But I also donated some tracks to the German Electronic Music Club Schallwende. They give a sampler CD every year to their members, so these tracks were never really for sale for everyone. There is also new (well actually old) material on the album. Some track that were never released. One track that didn't make my AeroDynamics debut album because I had 68 minutes already. And 2 old tracks that I found on my computer and decided to finish. All track will be completely re-mixed and mastered by my good friend Ron Boots. The artwork was done by my youngest daughter Tamara van Osenbruggen. I'm very proud of that and she will do more for me in the future. I hope you like it. I really do. I will show more of the artwork later. You can read a little bit about the album here already: https://www.synth.nl/music/upcoming/timetravel
 As you all know my old studio was gone because of the divorce. With the help of my good friend Ron Boots I was able to build a new studio again in our new apartment in Rotterdam where I live with my girlfriend Sonja. She didn't plan for me to move in so there isn't much room. The studio is actually 2 x 3 meters, but I'm very happy with it. Here is a small tour of my new studio. I managed to save some equipment from my old studio and bought some used and new stuff to start all over again. Here is a nice overview of my desk. I'm still using Cakewalk Sonar from Bandlab and a Native Instruments Komplete master keyboard. Since the studio isn't very wide I build in as compact as possible. Most stuff is modules and eurorack modular. as you can see.

Behind me are some more synthesizers with keys. On top is the Nord Wave that I used a lot on the collaboration album together with Ron. So I had to keep that since there were still sound in there from that recording. Then there is a HydraSynth that I like a lot since it has a polyphonic after touch keyboard that also is nice to use with the Deckard's Dream I build. The the Alesis Andromeda, still one of the nicest synths to look at in my opinion and 16 voices of analog. The the Roland V-Synth. I used to have one of these in the past that I upgraded to a V-Synth GT later, but actually the old one sounds a lot better in my opinion. And of course it is cheaper as well. And last but not least the Korg Kronos. This one is also from the old Apollo studio since I used that on the album with Ron as well. Oh and by the way the new studio is called 'Jurassic Studio'. You will know by know I guess that I'm working on an album inspired by dinosaurs. Called PalaeonTology. Hopefully finished this year. I think I'm about at 50% on that now.

Here is a close-up view of my main tools. As you can see I'm a trackball person. I think that is way better than using a mouse. I also still have my Genelecs. I'm so used to this sound that I couldn't switch to other monitors only newer Genelecs. But the heart of my system if this (old) Euphonix/Avid Artist series set that I bought from E-bay. I really love it. It is connected by Ethernet and it integrates perfect with Cakewalk Sonar. I did have to do some customizing to use the Jog Shuttle. But even that runs very smoothly. I actually like this set better than the big Avid console I have in my old studio.

Here is a close-up of the left corner. Here are my newest additions. The Behringer ARP2600 to start with. I really love it. As you might know I did have a vintage ARP2600, but to be honest I like this one even better. Compact, more functionality and the sound is for be the same. On the right is a Midibox SID that I build myself back then. So also from the Apollo studio. C64 sounds all over. And finally the newest machine I bough the Waldorf Iridium. That is really a great synth with so much possibilities that I hardly don't even know where to start. But I'm sure you will be hearing a lot of it on my upcoming albums.


Again it has been quite for a while. And for a good reason. I started a new company. On this blog I will also update you on that. The company is called ArtiLED and as the name suggests it has something to do with Art and Leds. When I moved into my new apartment in Rotterdam I was looking for some special lighting and what I wanted wasn't available. So I decided to start building my own lights based on Smart Leds. Every light will be custom build from a raw piece of aluminum and every light will be it's own computer. Every led can be individually addressed and it will react to music and images. I will show you more later. If you can understand Dutch (of know how to use Google Translate) you can have a peek at the website I'm building even though it isn't finished yet. The first product will be a single Led Computer without the lamp. I will explain how and when later. For me this is the ideal combination of my hobbies. Electronics, 3D design and programming. Here is a small intro video. Here is the link to the website https://www.artiled.nl. You can also follow the company on Instagram if you like: https://www.instagram.com/artiledbv
 I have exiting news. The BorkHavn album I released together with Ron Boot is nominated for the Schallwelle Preis best album of the year 2020. We are in the top five which is pretty nice of course. People could vote on their favorite album on their website so I'm very honored that you chose our album. Thank you very much! Now a jury will decide I guess. Normally there is an award ceremony in Germany but because of Corona it will be done online now. You can read more about the award and the other nominees on this website: https://schallwelle-preis.de/. And in case you didn't know. My albums 'OceanoGraphy' and 'Apollo' did win this album of the year award in the past. So be sure to check them out if you haven't heard them. So fingers crossed :)
 The external 12V power supply brick has arrived. So I could finally finish the Deckard's Dream. First thing I did was again test all the voice boards individually. They all worked fine. I labeled them so that I know which board is which because they all have their individual tuning. Then I inserted them into the main board and attached them to each other with the spacers as you can see in the picture on the left. I was a bit surprised I had spacers in different lengths but it turns out that the distance between all the slots is not equal. I didn't expect that but luckily I had all the correct spacers in the parts kit. If I had ordered them myself I would have probably ordered all the same based on the first gap :)

And then an exiting moment. Testing the whole synthesizer. In this picture you see everything that is inside. Starting from left to right with the front panel, the hardware PCB sandwiched to the main PCB. The inserted in the Main PCB first the Power Supply board and the 8 voice boards. In the right bottom you see the output board and in the top right the external 12V 6A power supply brick. All tests went flawless and then I uploaded some patch banks I found online 4 banks in total, one of which hold some recreated Vangelis sounds. They sound so awesome :) I ended up playing a long time with them just with a little midi keyboard and my headphone on. Even without any effects. But I had to stop just there and do the last remaining bits. Everything still had to fit in the case. In the back of the case is a fan for cooling that should not be necessary but I installed it anyway. Luckily you can switch it on and off from the settings menu. So I'll start with it switched off and see if the Decard's Dream wont run hot in the studio.

Then you have to put the IO board in the back and attach the flat cable to it. The IO board is just attached to the case with the rings of the jack plugs for audio input and output. The fan is attached to the IO board with a connector. It is all vert well thought of in my opinion. So after putting it in the case again I tested it one more time and again I ended up playing on it for way too long. But last step left was to put it in the studio. I did leave room for it of course :)

 While waiting for the new external power supply I did something useful as well besides playing on the synth with 4 voices. I decided to put on the colored slider caps. Actually I wanted to wait to that it as a finishing touch when it was done, but I couldn't wait any more. I even read the manual since I didn't really understand what all sliders did, but it all makes sense to me now. Unfortunately the package with the power supply was delayed so more waiting .....

The next useful thing to do was put on the cooling blocks on the power supply. I was a bit surprised that everything so far was in the parts kit I bought from synthcube but not the m3 bolts for screwing these on. Luckily that is stuff I always have lying around at home. After that I started twisting the wires for the power supply. I did read that putting on these cooling blocks is not necessary when you change to TL062 and TL064 because the Deckard's Dream draws less current because of these and get less hot, but I decided that it wouldn't hurt either. More cooling is always better with electronics. I also took the rest of the case and started looking how everything should fit together. And then I found out the main board didn't fit in the case. Luckily there is a clear instruction about this on the build website. There is a 5 mm strips on both ends on the PCB that you can break of. There is a line cut into it to make that easier but I did it very carefully with some pliers trying not to damage anything on the main PCB.

 In the previous part I already said the Decard's Dream was coming alive. I had a menu on the display. Here is a picture of the display and knobs. I already put on the volume knob as well. The display is small but very high resolution so it is readable, but I do need my glasses for that :) So first I scrolled through all the settings to see what is there. I did find some interesting settings that I will try out later. But for now I especially want to know if everything works. I could not find a good test procedure on the build site so I started googling to see what other people did. And apparently it is a good idea to start testing all the knobs and sliders.

There is a special option in the menu to calibrate the sliders first. There are a number of sliders with a dent in the middle position. They go both up and down. Pitch course and fine. Balance between oscillator one and two, overall brilliance and the keyboard control sliders. You have to set them in the middle position before you start calibrating. Then there is a special option in the menu called 'debug' with this you can test all the sliders and know one by one. It reads out the value from 0 to 255. But I did see some stepping while doing this. I was a bit surprised. But I will figure that out later. For now all sliders seemed to work.

Nest thing to do was connecting the IO board back to the main board. It is connected via a flat cable. Here is the main output (mono) and also the midi connectors and the usb connectors. I hooked it up with USB to my notebook and then you get midi over USB. Next thing up was testing all the voice boards. I inserted a voice board in the first slot next to the Power Supply boards because I assumed that was the first slot. Then hookup up a midi keyboard to my notebook and used Midi-OX to connect the keyboard to the Deckards Dream. I expected to get some audio even though I would assume it would be out of tune or something, but nothing happened :( Then I read on the forum that you need to calibrate the voice boards, so I went in the menu and selected that option. Nothing happened. Like it didn't see the voice board at all. So i tried another voice board and same problem. I started panicking a bit and posted on the forum. But I was impatient for as answer and they I saw I made a very stupid mistake :) The slot next to the Power Supply board is actually slot 8 and now 1 :/ Duhh..

 Next thing to do was connecting the main PCB to the hardware PCB. After that I also did a quick power test and again the magic smoke stayed in :) I had some trouble determining how to mount the oled display so I didn't solder that yet. There is not much information available unfortunately about the mechanical construction of the Deckards Dream. I did look at some pictures online but still I didn't know for sure. So it was time to also screw on the front panel to see how it all fitted together. At first I had the spacers wrong so that the front panel was too far away. So this is a picture after the second attempt. And now I could also finally solder the oled display.

And then it was time for yet another exiting part of the whole build. Finally putting some software in the Deckard's Dream. You do need to buy a ST programmer for this and connect it a flat cable to the main PCB and with USB on your computer. You can freely download the programmer software. It did see my programmer right away and they you hit 'connect' to hook it up to the main PCB. There is actually a micro controller on the PCB. It is kind of a mini computer that controls everything and it needs software to run. You can download the 'bootloader' software from the Deckard's Dream build page and then you hit 'program' and it actually worked :) I got a success message. After this you disconnect the programmer and switch the Deckard's Dream of and on again. Some garbage appeared on the oled display. But then the manual said to hold the 'shift' button to boot it in USB mode. So I did and then the Deckards Dream acts as a USB drive and you can copy the firmware and factory sound banks on it. Reboot again and voila ! It came alive :) I had a working menu on the oled display.

Here is another picture of the backside where you can see the sandwich of the main pcb the hardware PCB and the front panel. You can also see the correct spot and orientation of the Power Supply PCB in this picture. The only thing I find strange is that all the boards will be connected together in the end. I don't know how yet at this moment, but I'm sure I'll figure it out. There are all hanging horizontally though in the cart-edge connectors without any fixture. So that is a bit surprising to me. But we'll see later about that.

 The German Electronic Music Club Schallwende released the SchallPlatte 23 sampler album with a brand new Synth.NL track on it called 'Gemini'. Normally the album is only given to the member of the club, but Groove Unlimited my record label has a few copies for sale on their website. They are very limited so if you want this CD I guess you have to be quick. There is also some other nice music on there by Ron Boots himself, UNI Sphere (Eric van der Heijden and Rene Splinter), Spyra, Stefan Erbe and more. I also liked the first track a lot Meteorite by Tonal Assembly. You can buy the album as a factory pressed CD here: http://www.groove.nl/jump2.php?artnum=88044

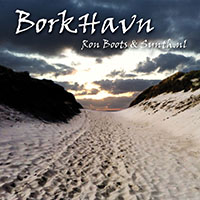
More information on the album here: https://www.synth.nl/music/collaborations/borkhavn
Ron Boots & Synth.nl – BorkHavn
CD/DIGITAL DOWNLOAD, Groove Unlimited, 2020
Many will recall Ron & Michel’s fine debut album “Refuge en Verre” based on music drafts made during a vacation of both families in Belgium. A decade later “BorkHavn” sees the light of day, distilled from live improvised music made in a similar setting a few years later during a vacation in Denmark. Make no mistake though as “BorkHavn” is a different sonic breed as its predecessor. As the musicians elaborate in the liner notes, the music is an true expression of their friendship. It’s also a powerful statement showing how both musicians complement each other in a surprising as well as beautiful manner.
The nine tracks feature emotive electronic music with a strong dynamic current connecting them. Many string pads and drums pass by on the outcome taking various twists and turns as its progresses. There’s the dynamic undercurrent sensed on the engaging opening title. Things take on an energizing orchestral/symphonic shape “Nordsøen”, entering psychedelic-infused and slightly experimental territory on “Gåpåmod”, firing off a powerful sequencer-lead on the jolly “Hjortebøf” while reflective sonic universes open up on “Stjernekiggeri” and “Torden”. Energy runs high on the freestyle yet groovy “Vindmøller” with a slice of “Acoustic Shadows” thrown in on the first half before the lush “Venskab” brings the album to a closure.
If you want an album with solid, attentively-made electronic music, “BorkHavn” should be your pick without hesitation.
Website: http://www.groove.nl
 Like I said in the last part it was time for some testing. I did a visual inspection of all the boards and could not find anything that seemed wrong. The only thing is that there was an error found on the output PCB. Once of the Capacitors was actually wrong on both the PCB and the schematics. So before testing I decided to desolder it and turn it around. After that I attach the power supply to my lab power supply and applied 12V to it. The nice thing about a lab power supply is that you can limit the current it gives so I slowly turned up the current and the power supply lit up and all voltage led were OK. After that I measured all the voltages and everything was fine :) No magic smoke this time :)


After this I did another modification on all the voice boards. The advise was to solder two 1 mega-ohm resistors on the backside of the voice boards. It has something to do with the glide function and making it more like the behavior on the original CS-80. You have to be very careful here you solder them to the right pins of course which is a bit more difficult to see from the back side. But luckily there is a clear picture on the Decard's Dream build page. After this I compared them and actually I made a mistake on one board I had to correct.

 I wish you all the very best for 2021! I hope it will be a better year
than 2020 and that there will be Electronic Music events again where we
can meet in real live. Let's make 2021 a Happy Synth Year! I'm currently
working hard on new music, so I hope to bring you some new releases as
well in 2021. I spend New Years Eve together with Ron Boots and his wife
Monique and my girlfriend Sonja. I also brought the music for the new
album (about dinosaurs) along with me and played for Ron what I had so
far in his studio. He liked it a lot so that is good news and motivates
to continue working on it. He also liked my dinosaur sounds and how I
integrated them into the music :) I hope to see you all soon. Stay
healthy and Safe!
I wish you all the very best for 2021! I hope it will be a better year
than 2020 and that there will be Electronic Music events again where we
can meet in real live. Let's make 2021 a Happy Synth Year! I'm currently
working hard on new music, so I hope to bring you some new releases as
well in 2021. I spend New Years Eve together with Ron Boots and his wife
Monique and my girlfriend Sonja. I also brought the music for the new
album (about dinosaurs) along with me and played for Ron what I had so
far in his studio. He liked it a lot so that is good news and motivates
to continue working on it. He also liked my dinosaur sounds and how I
integrated them into the music :) I hope to see you all soon. Stay
healthy and Safe!

 The last board I had to do is the Hardware PCB. This is basically the 'human' interface of the synthesizer. It holds all the knobs and sliders and the display. Again the first thing to do is solder all the SMD capacitors. You need to apply flux first if you want the solder to flow under the components connecting surfaces. I have become quite handy by now, but I do need some magnifying glasses to see everything. Age isn't helping me here :) My eyes have been better in the past.

On this board there are also components on both sides. So you have to watch carefully for that. Eventually this board will be hooked up to the Main PCB they will be connected with the two double header connectors you see on the right. I did try if it fitted and it did so I guess that is OK. There are also some resistors and IC Sockets that go on the back side.

 Yesterday the German Music Club Schallwende released their 23rd sampler CD called 'SchallPlatte'. They released this CD only to the member of the club to give them a nice holiday present because all the concerts were canceled due to the Corona crisis. My track is called 'Gemini'. This track was inspired by the Gemini Space program that superseded the
Apollo missions to the Moon. The Gemini project ran from 1964 en 1966
and was basically a dress rehearsal for Apollo. I didn't compose much
new music since my Apollo album in 2011, so this track felt a bit like a
dress rehearsal again for me too. Since the beginning of 2020 I finally
have a small studio again in Rotterdam (NL) after having to sell
everything because of my divorce. I'm currently working on several new
solo projects, but this was the first track produced in my new and very
small 'Jurassic' studio. I hope you like it. You can listen to the track on my website on this url: https://www.synth.nl/music/samplers/schallplattexxiii. The CD is not for sale officially, but Groove Unlimited might have a few in their web shop later on. I will let you know if they are available and put the link on the website.
Yesterday the German Music Club Schallwende released their 23rd sampler CD called 'SchallPlatte'. They released this CD only to the member of the club to give them a nice holiday present because all the concerts were canceled due to the Corona crisis. My track is called 'Gemini'. This track was inspired by the Gemini Space program that superseded the
Apollo missions to the Moon. The Gemini project ran from 1964 en 1966
and was basically a dress rehearsal for Apollo. I didn't compose much
new music since my Apollo album in 2011, so this track felt a bit like a
dress rehearsal again for me too. Since the beginning of 2020 I finally
have a small studio again in Rotterdam (NL) after having to sell
everything because of my divorce. I'm currently working on several new
solo projects, but this was the first track produced in my new and very
small 'Jurassic' studio. I hope you like it. You can listen to the track on my website on this url: https://www.synth.nl/music/samplers/schallplattexxiii. The CD is not for sale officially, but Groove Unlimited might have a few in their web shop later on. I will let you know if they are available and put the link on the website.

The next board I made was the IO board. This board takes care of the communication of the Deckard's dream with the outside world. The audio and midi connectors are on here, the power connector and also the USB connector. There is small SMD chip you have to solder on here and I was very confused about the orientation of this IC. So I asked on the Muff Wiggler forum and got some advice, but I'm still not 100% sure it is correct. I also read something about the Capacitors being wrongly oriented on the PCB and in the schematics. I guess I will have to be care full and do some measuring before I hook it up.

Another important board is of course the Power Supply. I still need to fix the cooling blocks but further this is not a very difficult PCB to create. The downside is though that it sticks in the same slot on the main PCB as the voice boards and you definitely do not want to mix them up. There is only one slot where the Power Supply should go. I also got the advise on the forum to test all the boards separately and the same goes for the Power Supply. Better test them all first with as less components inserted as possible. Also first test the PSU on the Lab Power Supply where you can limit the current to make sure you don't have any shorts.

 And here is a picture of the final assembly. I put the speaker back in place. I created an USB connection at the bottom of the case so I can power Wall-E that way but also for emergency programming in case the OTA (Over The Air) updates over WiFi should go wrong somehow. Then I won't have to open it up again for reprogramming. For the power I'm using a Raspberry Pi USB Power Supply with provides 5V at 2,5 Amp. I guess that should be more than enough. In the picture you can now also see the red LED I installed next to the Oled Display. That led is connected directly to an GPIO pin of the ESP12 only with a simple 220 ohm resistor in series you can see in the top right corner of the PCB. You can see the motor controller left on that and there is also a transistor on the PCB that takes care of powering the lights in the eyes of Wall-E connected to another GPIO pin of the ESP12.

And here is a picture of the complete assembled Wall-E. I'm not 100% happy with the placement of the display but this is really the best I could get. The glue on the double sided tape was very strong and I didn't want risking damaging another display since they are quite expensive. But overall I'm happy with the outcome. After all it is just a gadget for ourselves in our gadget cabinet. It has been quite a project. I have been busy with it for almost a month. Not every day of course, but including waiting for parts. You can control it by pressing the button that I forgot to mention previously. That is also attached to a GPIO of the ESP12. That is why I ran low on GPIO ports. They display already takes up 5 as well. OK I will conclude this series with some video's showing what it can do. And by now I can also control these scenes over voice commands and triggered by home automation scenes over WiFi. I hope you enjoyed this series.

 Posts
Posts