29 May 2014

Our New Office Space

As some of you might know I resigned in 2012 as CEO from BIT BV, the company that I founded together with my business partner in 1996. Don't worry we didn't sell it, but I didn't like the job of being CEO any more. I like working with my hand more and that wasn't possible anymore in the company. I'm still connected closely but in the background. So in 2012 I started a new company and since then I've been very busy setting up some new services and have been working on several products.

In the beginning of the year we did a little renovation at home, mainly putting in a new floor. Since both myself and my wife work from home now we decided to build a little office at home. In the picture above you see my work space on the left and hers on the right. Here is a close-up of my workspace. It is mainly focussed on doing both maintenance of the Virtiso and the Render Farm hardware/cloud platforms and also on doing 3D design and animation stuff for Van Osenbruggen Productions. I can also work on my videos for here now. I'm currently working on new websites for Virtiso and the RenderFarm so more on that soon and also on what I do there. I know I haven't posted here in the while, but I will try do pick that up again.

Here is some of the input devices I use. On top (almost our of site) is a track pad, left a track ball in the middle a 3D mouse, then on the right my Oculus Rift and below a drawing pad. They all have their use in my work flow even though the Oculus is mainly for fun :). So this is where I spend a lot of my time lately. I also build a very special work station. I will do another post on the soon.

So I can hear some of your thinking. Did he stop making music? No I didn't! To be honest I can't wait to get back to that very soon, but I just had to start up all this new business too. That took a lot of time. Unfortunately as many of you know, you can't make a living from music any more especially the kind of music I make with Synth.nl. I will pick that up for sure soon. I plan some changes in the studio first that I will tell you about as well. OK enough on the office now. I just wanted to share with you what has been happening here lately.

3D Print for the Kids

I didn't use the 3D printer for a while since it actually broke down. I had some material stuck in the extruder and couldn't get it out. When I removed the print head I could push it out, but accidentally damaged the NTC resistor that measures the heads temperature, so I had to replace that as well. Well that is all done now. Another problem I had was that the material didn't stick well to the print bed. After reading and experimenting a lot I finally decided to stick blue 3M scotch tape to the bed and now it prints like a charm :)

But what to print then to test if it is working OK again. I decided it was time to print something for my kids. I have two daughters in the age of 11 and 13 so what to print for them. Well I did print a nice T-Rex puzzle for myself a while ago and back then I found some more of those so I started to look with them for something they would like. And we did find this very nice one. Here is a picture of all the parts and then look what you can make from that :)

A very nice butterfly. Actually it isn't as easy as it looks to put it together. Since the printer has some tolerance some parts don't with and you will have to use a knife to make the connections a but smoother and then still you need some force to put the parts together. The good side about this is that once it fits it won't fall apart easily. By now I have quite some colors of PLA print material on stock so they could choose their own colors.

As you might have guessed my oldest daughter wanted one in pink and the youngest in yellow. A nice project that took my mind of work for some time. I have been way too busy lately to be honest. Printing and building a butterfly like this is a whole day's work by the way. Of course you can do other things while printing, but still you have to keep an eye on the printer as well as somethings things go wrong. Here is a last picture of both of them together.


24 May 2014

Biz2Be 3D Logo Animation

I made another 3D Logo Animation. This this for Biz2Be. It was animated in Cinema 4D and it was rendered in High Quality on RenderFarm.NL. The customer uses the logo as intro and outro of his videos that you can find on http://www.biz2be.nl.

05 May 2014

New Website for TTV BIT.NL

Some of you might know that I also play table tennis. And if you didn't now you know ;) I recently made a new website for the table tennis club. I used to of our players pictures in the header of the website. The most important new feature on the site is the new calendar and the news section up front. The website is hosted at the shared Joomla webhosting of Virtiso BV. I hope you like the new design. You can find the live website at: http://www.ttvbit.nl

Meet Tracy Ray at RenderFarm.NL

As you all know by now probably one of the new companies I'm setting up is a commercial Render Farm. This new company is called RenderFarm.NL and it has a new face. She is called Tracy Ray. Tracy is in charge of all our render cows that are at your immediate disposal. I'm still working hard on the new website but the render farm is already operational, so do contact me (or Tracy) if you have a deadline and need some frames rendered. We support a lot of software already and are always open for new things. Even custom setups are possible. If you know people that are in the media / content creation or 3D animation business then please point them to us. Our contact details are on the website at http://www.renderfarm.nl

Let us know when you have a render job. You can e-mail me at tracy@renderfarm.nl for a quote.

09 March 2014

Makerbot Tractor 360 degrees animation

And here is a 360 degrees view of the 3D model of the Makerbot tractor as I promised. I hope it will help someone to do a better 3D print from this :)

Makerbot 3D Tractor Puzzle

Hi, I'm currently printing parts on my 3D printer for a tractor. The original design is my Makerbot, but I could not find any construction howto. Besides that I'm currently working on a 3D scene for my virtual render farm and I wanted a tractor in that scene as well and I though I would be fun to use the same one. So I started importing all the different parts from STL into Cinema 4D and layed them out and first of all gave them  some material to be able to identify them better.

Then I started building the thing together. I noticed right away that not everything is a tight fit by the way, but I guess a bit of glue can fix that on the plastic model eventually. For reference I used some pictures I found on the internet from other people that build it. Here is an in between render where I already assembled some sub components like the engine block, chassis, hood, and wheels. The big parts are quite logical, but there also are a lot of small parts where I really struggled where they should go.

In the end I even had 3 surplus parts. I really have no idea where they should go and everything looks alright to me :) In the picture you see the finished model. All in all it took me a Saturday evening to put it together. Printing the parts takes a lot longer, but at least now I know how much parts to print and also what colors and where they should go. I will make little 360 degree animation of the whole thing so other people might benefit from it. And if anyone does have a howto with clear instructions feel free to post the link here. OK back to work now :)

Datacenter Pyramid Animation

A little animation I made for a customer to show the management what happens with their ICT infrastructure if they don't put fire surpression in the power distribution are of their data center. The animation was made in Cinema 4D, the fire was done with Turbulence FD, I used a soft body dynamics for the rest. The Animation was rendered on the RenderFarm.NL render farm.

08 March 2014

NachtWacht Fan Video

A nice video Rob made of my 'NachtWacht' track that I made for the 'Dutch Masters' concept album. The track is made to the famous painting of Rembrandt. You can find more information about Dutch Masters on this url: http://www.synth.nl/dutchmasters

02 March 2014

Jeffrey visits Apollo Studio Again

Yesterday I was visited by Jeffrey again (AKA Synthex). He bought a Doepfer Dark Energy that didn't track very well, so firstly we calibrated and tuned it. Then Jeffrey finally got to play on the Elke Synthex that worked prefectly yesterday. Unfortunately that is not always the case. After that he recorded some music for a new album on several synths like the Jupiter 8, Minimoog and EMS VCS3. We had a great time as usual and for me it was actually good to have a break from my work finally. When they left I did a little extra work on one track that is taking shape quite well already. Then I exported all the tracks to WAV to Jeffrey can work on it in his own studio. It was nice to be in the studio again and I really must make some music of my own again soon :) Jeffreys father also filmed a bit, so I'm sure there will be a video on youtube soon. I will post it on my blog as well if I see it.

15 January 2014

iHeartSynths interview

I recently did a very nice interview with iHeartSynth.com about my studio and my music. I also made some new pictures for them to go along with the interview. One thing I also tell in the interview is that I removed the studio part on my Synth.NL website. I will try to keep you updated from time to time on this blog, so be sure to subscribe or look once in a while. You can find the interview on this URL: http://www.iheartsynths.com/artist-interviews/synth-nl/. I hope you enjoy it.

23 December 2013

SchallWelle Awards Voting

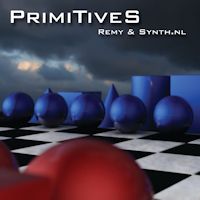
Like last year I'm nominated again for the SchallWelle awards. Together with Remy Stroomer this time with our collaboration album 'PrimiTiveS'.

You can find Remy & Synth.nl in: Artist 2013 international
And PrimiTiveS in: Album 2013 international
Bring out your votes (also the simple instructions are explained here):

http://voting.schallwelle-preis.de/
I wish you all Happy Holidays and a Merry Christmas (if you celebrate it of course).

22 December 2013

New Mutec Word Clock Generator

 I have a lot of digital out board gear that needs to synchronize. For this I use Word Clock. So far I used an Apogee Big Ben to generate and distribute the clock signal, but it has only 6 outputs. This means you have to make a lot of loops and terminate them. Recently I had some trouble with my clocking and it looked like a loose terminator or connector, but go find that :( I could solve it by fiddling around at the cables, but this was only a temporary solution. So I decided this was one of the first things on my list to solve with the studio rebuild.

At first I looked for an extra distributor to replicate the Big Ben's signal, but eventually I chose to replace it by this Mutec iD + iD dp. I already had some equipment from them and it is really good stuff. This clock generator has 16 Outputs! This meant that I could seriously avoid looping the signal though several chains, but that I could attach more equipment directly to this clock generator. Today I decided to remove all BNC wires from the Big Ben and put this one in. As you can see in the picture it is in the same spot now.

And here is what I was left with after the operation. I replaced all cables by version that were as short as possible and removed as much T-connectors and terminators as possible, since they are usually the source of all clocking connection troubles. Where possible I used the internal 75 ohm termination of the equipment itself. Most digital equipment has a switch to select whether you want termination or not.

And here is the good old Big Ben on it way to someone else. I already sold it. It is a good machine and it has helped me trough several album recordings, but for me 6 outputs is not enough. They really should consider making a version with more outputs.

After I hooked everything up again and checked if all equipment was synched to Word Clock again, I did some testing and was curious if I could hear any difference. It might be my mind playing with me, but I had the idea the sound was a bit brighter than before. But the problem is with these kind of things that you can't really be objective. But the most important thing is everything works again and is clocking like new :) More updates soon. For today it was enough of a job :) You can find more information on Mutec here: http://www.mutec-net.com

21 December 2013

Clavia Nord Lead 4 in the Studio

You all know by now I guess I have a thing for Clavia synthesizers. I still remember the first time I saw Jean Michel Jarre play the Nord Lead 1 when he introduced it during his concert in Rotterdam. I just had to have one. It was the first virtual analog synthesizer back then. In the mean time Clavia did quite some improvements and just introduced the 4th model: The Nord Lead 4. This time it has an extra effects section, just like they did on the Nord Wave.

In the effects section there is also a drive button, that gives the sound a subtle overdrive effect. I really like that. It has again become a more mature synthesizer than the Nord Lead 2 I was used too, even though I have the impression that the Nord Lead 2 sound a bit more 'raw'. As you can see in the picture on the right there are actually 4 Clavia's in my studio now. I'm doubting if I will keep the Nord Lead 2 but, the Nord Modular G2X en Nord Wave are actually quite different synthesizers. I had to let one machine go, since the studio is full. So if something goes in something has to go out. This time I sold the M-Audio Venom. It was nice for a while, but not special enough to keep. For now I will be making some presets for the Nord Lead 4. Hopefully that will give me some inspiration to start some new music soon. Keep an eye on this blog. More news is coming soon. I'm actually rebuilding the studio a bit and of course I will keep you posted on the blog on this project.

Virtiso now VMWare VSSP Provider

Virtiso BV is now officially VMWare VSSP Partner. This means we can use all the software there is from VMWare and you pay for it on a montly basis. This makes working with VMWare very flexible and it also means that our customers profit from paying a low montly fee for their Virtual Server based on VMWare.

Virtiso BV specializes in services based on virtual servers. You can rent virtual servers from us from 35,- euros per month including Ubuntu Linux, maintenance, monitoring and nightly backup. Maintenance means keeping the operating system up to date including installing security updates. If you choose for the Windows operating system we are also MicroSoft SPLA partner so you can benefit from the same monthly payment structure for you licenses.

If you are interested in renting virtual servers based on VMWare do contact us on info@virtiso.nl

15 December 2013

NewTek LightWave 1.6 now on RenderFarm.NL

From today RenderFarm.NL also supports NewTek's LightWave version 1.6. So If you use this 3D application and you need affordable render capacity for your 3D animations you can contact me on michel@renderfarm.nl. I also did some minor updates on the RenderFarm.nl website that you can find on http://www.renderfarm.nl

04 December 2013

First Useful 3D print

Today I finished my first usefull 3D print. The machine you see on the left is our coffee machine. Once in a while it needs cleaning and then there is water coming from the two nozzles left and right. Since there is not much space and it is quite a lot of water coming out of it, my wife usually has to pay attention since she has to empty the stuff she used to put under there half way. But it always is a bit messy. So we came up with the idea to make custom made compartments to hold the water.

As you can see in the picture on the right this is quite a large object already for the printer. It also took about 20 hours to print each of them. I designed the whole thing in Cinema 4D by the way and then exported to STL format. It is really nice to be able to make something like this just from software I already know :) Yesterday we did the first cleaning cycle with them and it worked out really fine. So another project finished.

It might look easy by the way, but I can assure you that this project took a lot of time. I also had a misprint where the PLA on the role got tangled :( So after 15 hours of printing or so, I could start all over again. So far every time I walk away from a print, something goes wrong. So I now plan my prints when I'm at home the whole day. So yes... 3D printing is nice. But it is time consuming and you need to know what you are doing. I'm really looking in to a more professional printer now, to hopefully get better quality and less hassle. I'll keep you posted :)

27 November 2013

New Synths in the Studio

After a very long time of buying completely nothing, suddenly I saw a synthesizer that has been on my wish list for the collection from day one. Never before I found one for sale in a condition like this one. It is an EMS 'Putney' VCS3. It is quite a rare synthesizer that was made in 1969. That is also the year that I was born, so that makes it extra special for me. It is a modular synthesizer that became famous famous because of its unique joystick, envelope fire button and the patch matrix. The matrix works with little pins and is actually quite convenient compared to plugging in patch cables to modules.


The machine is really in a great state, everything works and I'm so proud :) There is actually one in the London science museum you know :) That was the last time I saw one. The EMS's are actually perfect for creating sound effects and that is what Jean-Michel Jarre has used it for a lot. He made EMS famous together with Pink Floyd I guess who made there famous 'on the run' sequence on it. Well on the right is a nice pictures of the other machine I love for sound effects the ARP 2600.

And here is another syntesizer that I added to the collection. It is a Sequential Circuits Pro One. It is of the same make as the famous Prophet 5. This one is monophonic though. It is supposed to be great for bass sounds. To be honest I never played on one before, so this is new territory for me as well. A very nice feature is that it also has a sequencer on board. I can't wait to play around with it, but first I have to have a go at the VCS3 :)

24 November 2013

Another 3D Print - Star Wars Tie Fighter

Last week suddenly I heard a noise and I saw the extruder of the 3D printer I build hanging on only one screw. I tried to fasten everything again, but I had no luck what so ever. So before I could do any more printing I had to take the whole extruder apart, fasten the screws a but more and put it back together. That was a little setback, but unfortunately it didn't end there. After that I had to recalibrate the head distance and I had no luck in that.

The material just didn't want to stick to the heated print bed anymore. I tried cleaning with alcohol, rubbing it a bit with sand paper like I did before, but no luck. Then I started looking on some forums for a solution and I found one. Painters tape! Very cheap stuff that you can just stick on the print bed and after that I printed like a charm. I guess by now you would have guessed from seeing the pictures of a print in progress.

The model I printed came from ThingiVerse and it is a tie fighter from Star Wars. I really like the look of that model. It consisted of three separate printable parts that you eventually have to glue together. But before I got to this point there was some more trouble. After the first print was finished, the material was stuck to the painters tape so well, that I couldn't get it off. I printed in PLA and that is quite fragile, so I could not use too much force since then the material would break.

So again I went to look for a solution and I found one. The tip was to use a spraycan with compressed air, put it up side down on purpose so that the stuff coming out is frozen. This cools the object to quickly that it shrinks a bit and pops loose. And guess what? It worked :) I will go and look now though for blue painters tape since they say this is less sticky. So that is worth the experiment. All in all the model is done and I really like it. But again I found out that printing on a DIY 3D printer is not so easy as it looks. Ah well most important thing. It still works. Up to the next project.

VrayForC4D update on RenderFarm.NL

Last week I upgraded all the VrayForC4D installations on the render farm to version 1.8.1. This version is quite a major upgrade and is now based on the Vray 2.45 kernel. I am running this on C4D R13, R14 and R15 now on the farm.

If you are interested in running a job on my render farm then do contact me on michel@renderfarm.nl